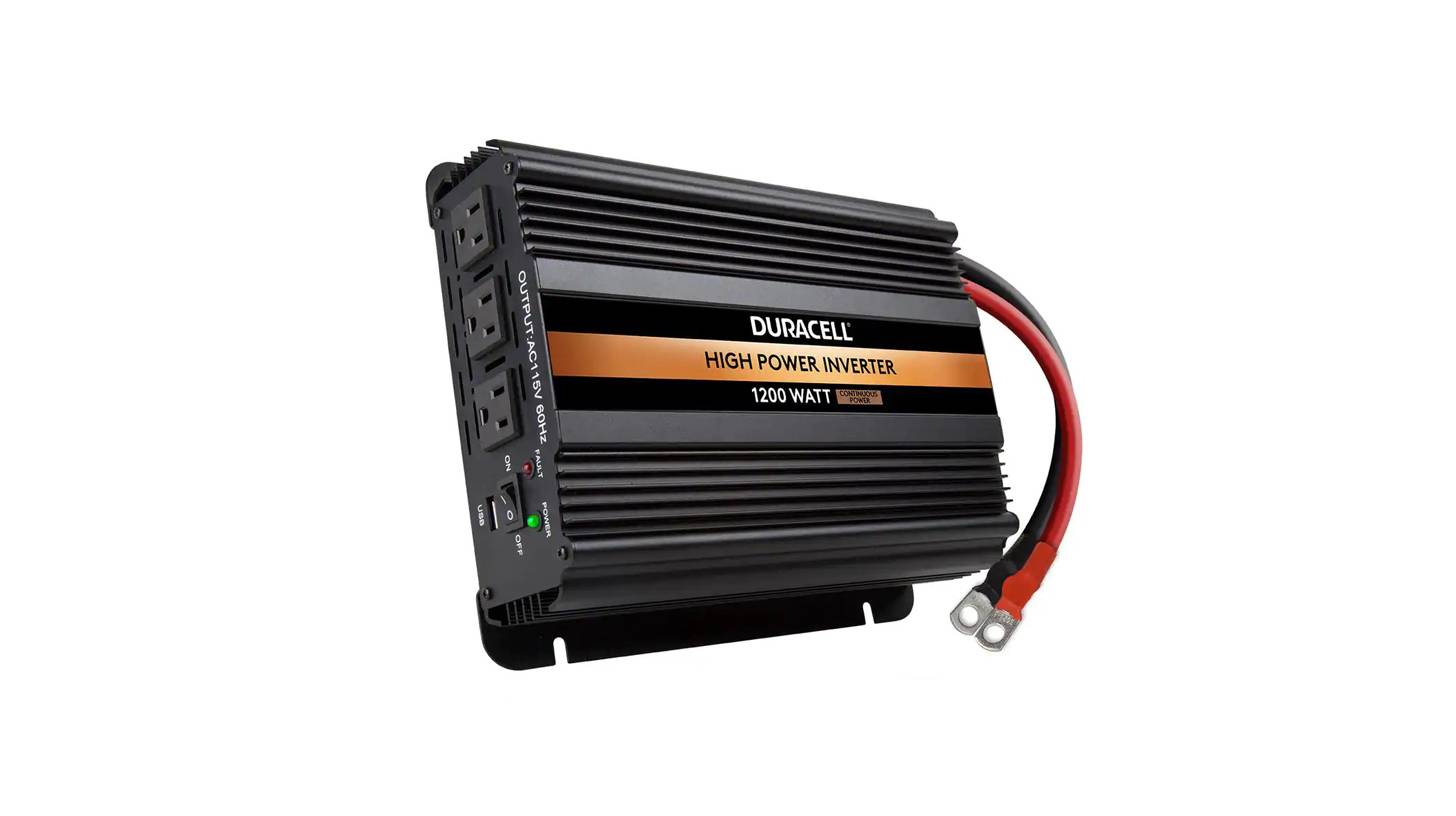
Inverters in Parallel vs. Series

When it comes to optimizing power systems, the configuration of inverters—whether in parallel or in series—plays a crucial role in determining the overall performance and efficiency of the system. Inverters, essential components in converting direct current (DC) to alternating current (AC), can be configured in different ways to achieve various objectives. This comprehensive guide delves into the key distinctions between parallel and series configurations, breaking down the technical aspects to provide a clear understanding.

Load Sharing in Parallel: Enhancing System Capacity

Simple Explanation: Collaborative Power Distribution

In a parallel configuration, multiple inverters work together as a cohesive unit to share the power load. Think of it as a team of individuals collaborating on a project—each member contributes to the workload, resulting in a combined effort that surpasses individual capabilities. Similarly, parallel inverters distribute the power requirements among themselves, enhancing the overall system capacity.

Technical Insight: Combined Capacity and Power Output

Parallel inverters operate by connecting their outputs together, thereby sharing the electrical load. For example, if two 3kVA inverters are connected in parallel, their combined capacity results in a total of 6kVA. This setup not only increases the power output but also enhances the system’s reliability and redundancy. If one inverter fails, the others continue to support the load, ensuring uninterrupted power supply.

Voltage Increase in Series: Amplifying Voltage Levels

Simple Explanation: Stacking for Higher Voltage

In a series configuration, inverters are connected sequentially, akin to stacking batteries in a flashlight to achieve higher voltage. The primary goal of this setup is to increase the voltage rather than the total power capacity. This approach is useful when specific voltage levels are required for certain applications.

Technical Insight: Voltage Addition Without Power Capacity Change

When inverters are connected in series, their voltage outputs are additive. For instance, connecting two inverters, each with a voltage of 120V, results in a combined output of 240V. However, it is crucial to note that the overall power capacity remains unchanged. This configuration is ideal for scenarios where increased voltage is needed without altering the overall power capacity.

Comparing Overall Capacity: Parallel vs. Series

Simple Explanation: Power vs. Voltage Enhancement

The choice between parallel and series configurations depends on whether the goal is to increase power or voltage. Parallel connections are focused on boosting overall power capacity by combining the capabilities of multiple inverters, whereas series connections aim to elevate the voltage output without changing the total power capacity.

Technical Insight: System Strength and Voltage Levels

In parallel configurations, the system’s overall capacity is enhanced as the inverters share the load, making it suitable for applications requiring higher power. Conversely, series configurations are designed to achieve specific voltage levels, making them appropriate for applications where increased voltage is necessary. The choice between these configurations should align with the specific requirements of the power system.

Design Considerations for Optimal Configuration

Simple Explanation: Selecting the Right Configuration

Choosing the right inverter configuration is akin to selecting the appropriate tools for a particular task. Parallel configurations are ideal for applications demanding higher power, while series configurations are suited for situations requiring specific voltage levels. Understanding the unique needs of your power system will guide you in making the optimal choice.

Technical Insight: Tailoring the System to Requirements

Designing an effective inverter system involves assessing the specific requirements of the application. For increased power capacity, parallel configurations are preferred, as they enable load sharing and system redundancy. For achieving precise voltage levels, series configurations are more appropriate. Each configuration has its advantages, and the selection should be based on the desired outcome and operational needs of the power system.

Conclusion: Aligning Configurations with Needs

Simple Explanation: Power and Voltage Optimization

In summary, the choice between parallel and series inverter configurations hinges on whether the objective is to enhance power capacity or achieve higher voltage levels. Parallel inverters work together to increase the overall power output, while series inverters stack to boost voltage. Each configuration serves distinct purposes and should be chosen based on the specific needs of the application.

Technical Insight: System Efficiency and Reliability

Understanding the differences between parallel and series configurations is vital for designing power systems that meet specific performance and reliability criteria. Whether aiming for increased power capacity or higher voltage, selecting the appropriate configuration ensures an efficient and dependable power supply. By aligning the inverter setup with the unique requirements of your system, you can optimize performance and achieve the desired results.

Why are inverters connected in parallel?

In the quest for efficient and reliable power systems, connecting inverters in parallel stands out as a critical technique. This approach significantly elevates system power capacity, enhances reliability, and provides a robust backup solution. This article delves into the intricacies of parallel inverter configurations, explaining their benefits and operational mechanisms in a comprehensive manner.

Boosting Overall Power Capacity

Parallel Connection Explained

Connecting inverters in parallel is akin to aggregating the strengths of multiple units to achieve a higher power output. When inverters are linked in parallel, their individual power outputs combine to meet higher energy demands. This increases the overall capacity of the power system beyond the limits of a single inverter.

Technical Insight

The parallel configuration allows for the sum of the power ratings of each inverter to be utilized. For instance, if each inverter has a capacity of 5 kW and three inverters are connected in parallel, the total system capacity becomes 15 kW. This configuration is especially valuable in scenarios requiring more power than a single inverter can deliver. The ability to scale up by adding more inverters ensures that the system can handle greater loads and adapt to varying energy needs efficiently.

Enhancing System Reliability

Reliability Through Redundancy

Inverter reliability is crucial for maintaining consistent power supply. Paralleling inverters introduces a layer of redundancy, making the power system more robust. When inverters are connected in parallel, the failure or maintenance of one unit does not disrupt the entire system. Instead, the remaining inverters continue to operate, ensuring uninterrupted power delivery.

Technical Insight

When inverters are configured in parallel, the load is distributed among all units. This means that if one inverter encounters an issue, the others can still manage the power demands. For example, if a 10 kW system with two parallel inverters each rated at 5 kW faces a failure in one unit, the remaining inverter continues to supply power at its rated capacity, minimizing downtime and maintaining system functionality.

Providing Seamless Backup

Backup Mechanism

A major advantage of parallel inverter systems is their inherent backup capability. This configuration ensures that if one inverter fails or requires maintenance, the other inverters automatically take over the load, providing a continuous power supply. This backup function is vital for applications where uninterrupted power is essential.

Technical Insight

In a parallel setup, the operational inverters compensate for the loss of power from any failed unit. For example, in a system with four parallel inverters, if one fails, the remaining three can handle the power load, albeit at slightly reduced capacity. This seamless transition prevents power outages and maintains operational stability, which is particularly important for critical applications such as data centers, healthcare facilities, and industrial processes.

Ensuring Continuous Power Supply

Uninterrupted Power Flow

The primary objective of paralleling inverters is to ensure a continuous power supply. By connecting inverters in parallel, the system is designed to handle the temporary loss of power from any single unit without affecting the overall performance.

Technical Insight

In practice, this means that if an inverter in a parallel configuration requires maintenance or experiences a fault, the power supply remains unaffected due to the operational inverters. This setup is particularly advantageous for systems with critical power requirements where any interruption could lead to significant operational disruptions or financial losses. The ability to maintain power flow even when part of the system is offline is a key benefit of parallel inverter configurations.

Design Considerations for Parallel Inverter Systems

System Sizing and Configuration

When designing a parallel inverter system, it is essential to consider the sizing and configuration of the inverters to ensure optimal performance. Factors such as the total power requirement, inverter ratings, and load distribution must be carefully evaluated to achieve the desired outcomes.

Technical Insight

Proper sizing involves selecting inverters that can collectively meet the power demands of the system. Additionally, the configuration should ensure that the inverters are capable of handling the distributed load effectively. This requires attention to factors such as voltage matching, current sharing, and synchronization between units. Ensuring these parameters are well-managed will contribute to the overall efficiency and reliability of the system.

Maintenance and Monitoring

Routine Maintenance

Regular maintenance of parallel inverter systems is crucial to sustaining their performance and reliability. This involves inspecting each inverter, checking for any signs of wear or malfunction, and ensuring that all units are operating within their specified parameters.

Technical Insight

Effective maintenance practices include routine inspections, cleaning, and testing of inverters. Monitoring systems can provide real-time data on the performance of each unit, allowing for early detection of potential issues. This proactive approach helps in addressing problems before they escalate, ensuring the continued smooth operation of the power system.

Conclusion

Connecting inverters in parallel is a strategic approach to elevate system power capacity, enhance reliability, and provide a reliable backup solution. This configuration allows for increased power output, continuous operation despite individual unit failures, and seamless power supply for critical applications. By understanding and implementing parallel inverter systems, one can ensure a robust and efficient power solution that meets demanding energy needs.

In summary, paralleling inverters is akin to forming a resilient team of power sources. Each unit contributes to the collective capacity and reliability, ensuring that the system remains operational and effective in delivering continuous power. This approach not only optimizes performance but also provides a safeguard against potential interruptions, making it an invaluable strategy for modern power systems.

How do you parallel a 5kVA inverter?

Inverters are a game-changer when it comes to ensuring an uninterrupted electricity supply. If you’re considering parallel connecting your 5kVA inverter, you’re on the right track! Let’s delve into the world of inverters, understand what a 5kVA inverter entails, and explore how to parallel connect them for maximum power output. Prepare to supercharge your energy needs like never before!

Understanding Inverters and Their Uses

Inverters are sophisticated electronic devices that convert direct current (DC) electricity into alternating current (AC). This conversion is essential for powering various electrical appliances, ensuring a smooth flow of power whether you’re facing outages or operating in off-grid settings. Inverters come in various sizes and capacities, accommodating needs from small residential units to large industrial systems.

Their versatility makes them suitable for numerous applications, including solar power systems, backup generators, RVs, boats, and more. By transforming DC energy from batteries or solar panels into AC power, inverters facilitate the efficient use of renewable energy sources. Understanding how inverters operate and their applications can empower you to make informed decisions about your power supply system.

What is a 5kVA Inverter?

A 5kVA inverter is a power conversion device designed to convert DC electricity into AC electricity with a capacity of 5000 volt-amps. This means it allows your battery or solar power system to operate household appliances that require AC power. The 5kVA inverter is particularly valuable for backup power systems, off-grid living, or even as a primary energy source.

Compared to smaller inverters, the 5kVA model can handle higher loads, offering greater flexibility and reliability for powering multiple devices simultaneously. Whether you need to stay connected during blackouts or aim for sustainable living off the grid, a 5kVA inverter is a robust solution for maintaining operational continuity.

Benefits of Parallel Connection for Inverters

Parallel connection of inverters presents several advantages, significantly enhancing the performance and efficiency of your power system. By connecting multiple inverters in parallel, you can boost the total power capacity to meet elevated energy demands, which is especially useful when a single inverter might not suffice.

Increased Power Capacity

Parallel connection enables you to increase the total power output by combining the capacities of each inverter. This setup is ideal for scenarios requiring more power than a single unit can provide.

Improved Load Distribution

Distributing the workload among parallel-connected inverters enhances overall system reliability and reduces the strain on individual units. This distribution helps prevent overheating and potential failure of any single inverter.

Greater Flexibility and Scalability

Parallel connection allows for the modular expansion of your power system. As energy needs grow, additional inverters can be integrated seamlessly into the existing setup, offering a scalable solution without necessitating a complete system overhaul.

Incorporating parallel connection into your inverter setup leads to enhanced performance, increased reliability, and superior versatility for powering various electrical loads efficiently.

Step-by-Step Guide on How to Parallel a 5kVA Inverter

Decided to parallel connect your 5kVA inverters? Follow this straightforward guide to achieve optimal results:

1. Ensure Compatibility

Ensure that both inverters are of the same make and model. Compatibility is crucial for successful parallel operation.

2. Switch Off and Disconnect

Turn off both inverters and disconnect any loads or batteries to ensure safety during the connection process.

3. Connect the Terminals

Using appropriate cables, link the positive terminals of both inverters together. Repeat this process for the negative terminals.

4. Power Up and Configure

Turn on each inverter one at a time. Set them to ‘parallel mode’ if applicable and check the display panels for any error messages before proceeding.

5. Introduce Loads Gradually

Introduce loads incrementally to test if the inverters are working together correctly. Monitor voltage levels and adjust settings as needed.

Always refer to your inverter’s manual for model-specific instructions and safety precautions.

Precautions and Safety Measures When Parallel Connecting Inverters

Safety is paramount when parallel connecting inverters. Adhere to these precautions to ensure a safe and effective setup:

1. Follow Manufacturer’s Instructions

Carefully read and adhere to the manufacturer’s guidelines for your specific 5kVA inverter model to avoid operational issues.

2. Verify Specifications

Ensure all inverters have identical specifications and ratings to prevent inefficient operation or potential damage.

3. Secure Connections

Double-check that all connections are tight and secure. Use proper insulation materials on exposed wires to mitigate electrical hazards.

4. Ensure Adequate Ventilation

Inverters generate heat during operation. Proper ventilation is essential to prevent overheating and extend the lifespan of your equipment.

Troubleshooting Common Issues with Parallel Connected Inverters

Even with multiple inverters connected in parallel, certain issues might arise. Here’s how to troubleshoot common problems:

1. Load Distribution Imbalance

If there’s an imbalance in load distribution, verify that each inverter is connected to a similar load to ensure balanced operation.

2. Mismatched Settings

Check for discrepancies in settings or configurations among the inverters. Ensure all units operate at consistent frequencies and voltages.

3. Faulty Cables or Connections

Inspect cables and connections for faults. Replace any damaged cables and address loose connections to restore proper synchronization.

4. Seek Professional Assistance

If persistent issues occur despite troubleshooting, consult a qualified technician familiar with parallel-connected systems. Always prioritize safety when dealing with electrical components.

Conclusion: Is Parallel Connection Worth It for Your 5kVA Inverter?

Parallel connecting your 5kVA inverter can significantly enhance power capacity and system flexibility, making it a valuable option in various scenarios. Consider compatibility, safety measures, and specific requirements before proceeding with parallel connections. By following the provided guidelines and precautions, you can achieve a smooth and efficient operation.

In summary, parallel connection can be highly beneficial for your 5kVA inverter if executed correctly. Evaluate your needs and weigh the advantages against potential risks to make an informed decision that best suits your power requirements.


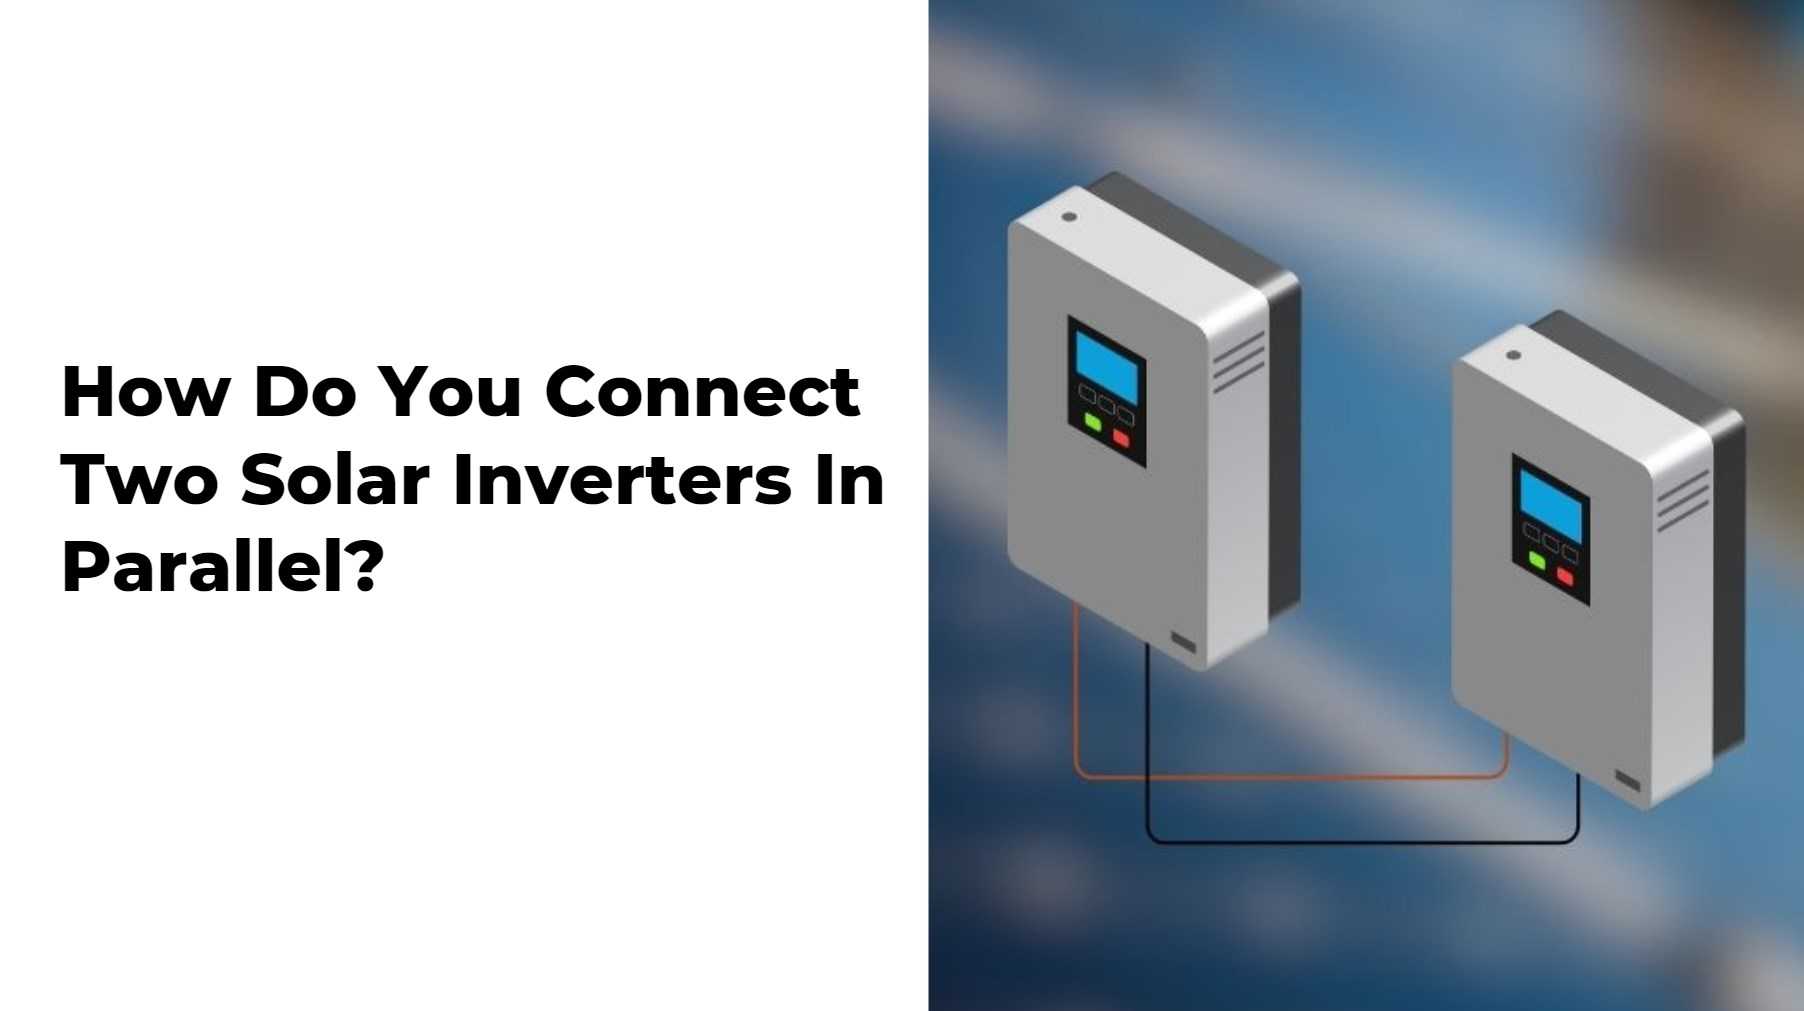
How Do You Connect Two Solar Inverters In Parallel?

How Do You Connect Two Solar Inverters in Parallel?

Connecting two solar inverters in parallel can significantly enhance your solar power system’s capacity and efficiency, allowing it to handle more energy from solar panels effectively. This process involves ensuring compatibility between inverters, following safety precautions, and adhering to a systematic connection procedure.

How Do You Connect Two Inverters in Parallel?

To connect two inverters in parallel, first ensure they are compatible by checking their specifications for voltage and frequency settings. Then, connect the DC outputs from your solar panels to each inverter’s DC input terminals and link their AC outputs together using a combiner box or directly into a shared load.

What Are the Safety Considerations for Connecting Inverters?

Safety is paramount when connecting inverters; always disconnect power sources before starting work, use appropriate fuses or circuit breakers to protect against overcurrent, and ensure proper grounding to prevent electrical hazards during installation.

How Do You Ensure Compatibility Between Inverters?

Compatibility between inverters must be verified by checking manufacturer specifications to confirm that both units can operate together without issues related to voltage mismatches or waveform differences that could lead to inefficiencies or equipment damage.

What Is the Step-by-Step Process for Parallel Connection?

The step-by-step process includes:

  1. Confirming inverter compatibility.
  2. Installing both inverters according to manufacturer guidelines.
  3. Connecting DC inputs from solar panels to each inverter.
  4. Linking AC outputs together.
  5. Testing the system under load conditions.

What Are the Benefits of Connecting Inverters in Parallel?

Connecting inverters in parallel increases overall power capacity, enhances system redundancy (ensuring continued operation if one inverter fails), and optimizes energy harvesting from solar panels by distributing loads more efficiently across multiple units.

How Do You Test Parallel Connections?

Testing involves applying a load after connection and monitoring performance metrics such as voltage output and current flow to ensure both inverters operate correctly together without any discrepancies or failures.


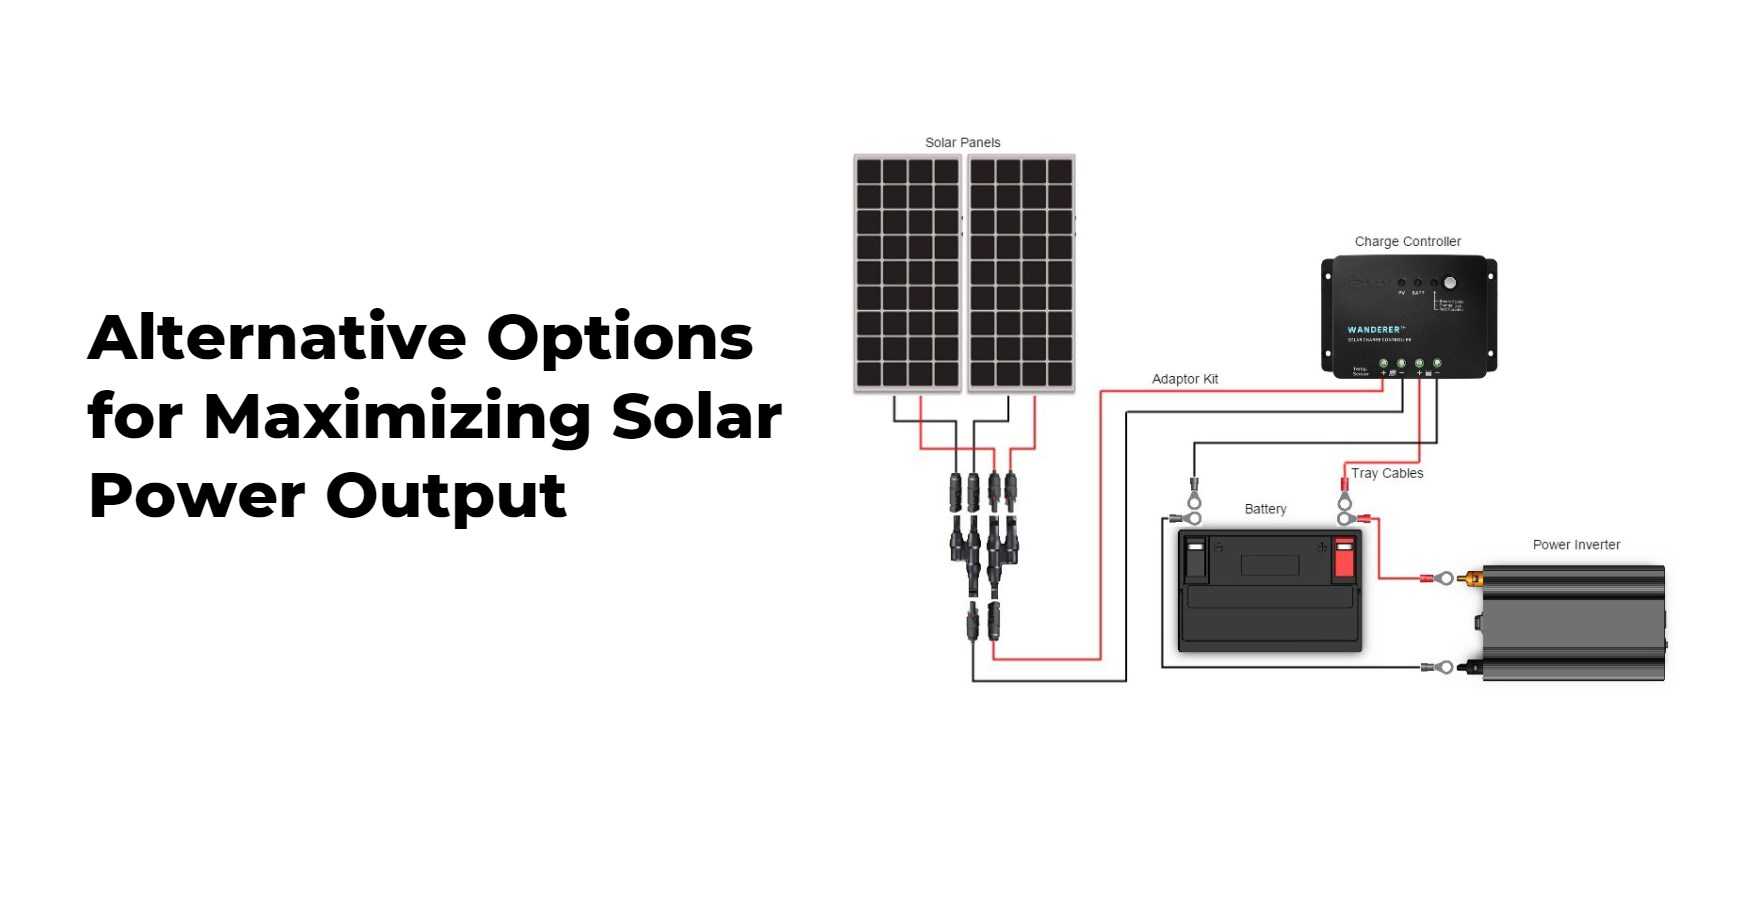
Alternative Options for Maximizing Solar Power Output

What Equipment Is Needed for Connecting Inverters?

Essential equipment includes compatible inverters, appropriate wiring (sized for combined current), circuit breakers or fuses for safety, a combiner box if necessary, and tools such as screwdrivers and wire strippers.

How Do You Troubleshoot Common Issues with Parallel Inverters?

Common issues include imbalances in output voltage or current flow discrepancies between units; troubleshooting steps involve checking connections, ensuring equal cable lengths, verifying settings on each inverter, and consulting manufacturer guidelines.

What Are the Electrical Codes for Parallel Inverter Connections?

Electrical codes vary by region but generally require compliance with local regulations regarding installation practices, grounding methods, and safety standards; always consult local codes before proceeding with installations.

How Does Parallel Connection Affect System Efficiency?

Parallel connections can enhance system efficiency by balancing loads across multiple inverters; however, improper installation or mismatched units can lead to inefficiencies or reduced performance.

Can Multiple Inverters Be Connected in Parallel?

Yes, multiple inverters can be connected in parallel as long as they are compatible; this allows for greater scalability of solar power systems to meet increasing energy demands effectively.Expert Views:
“Connecting two solar inverters in parallel requires meticulous attention to detail regarding compatibility and safety measures—when executed correctly, it not only amplifies your energy output but also fortifies your system against potential failures.”FAQ Section:

  • What should I check before connecting two solar inverters?
    Ensure compatibility regarding voltage and frequency settings between both units.
  • Is it safe to connect multiple solar inverters?
    Yes, but safety precautions must be followed meticulously to avoid electrical hazards.
  • What tools do I need for connecting solar inverters?
    Basic tools include screwdrivers, wire strippers, appropriate fuses or circuit breakers, and possibly a combiner box depending on your setup.

Parallel Inverters

Know more:

What are Tips for Parallel Connection of Hybrid Inverters?

What is Process for Connecting Batteries to Hybrid Inverters?

What are Installation Guidelines for Hybrid Inverters?

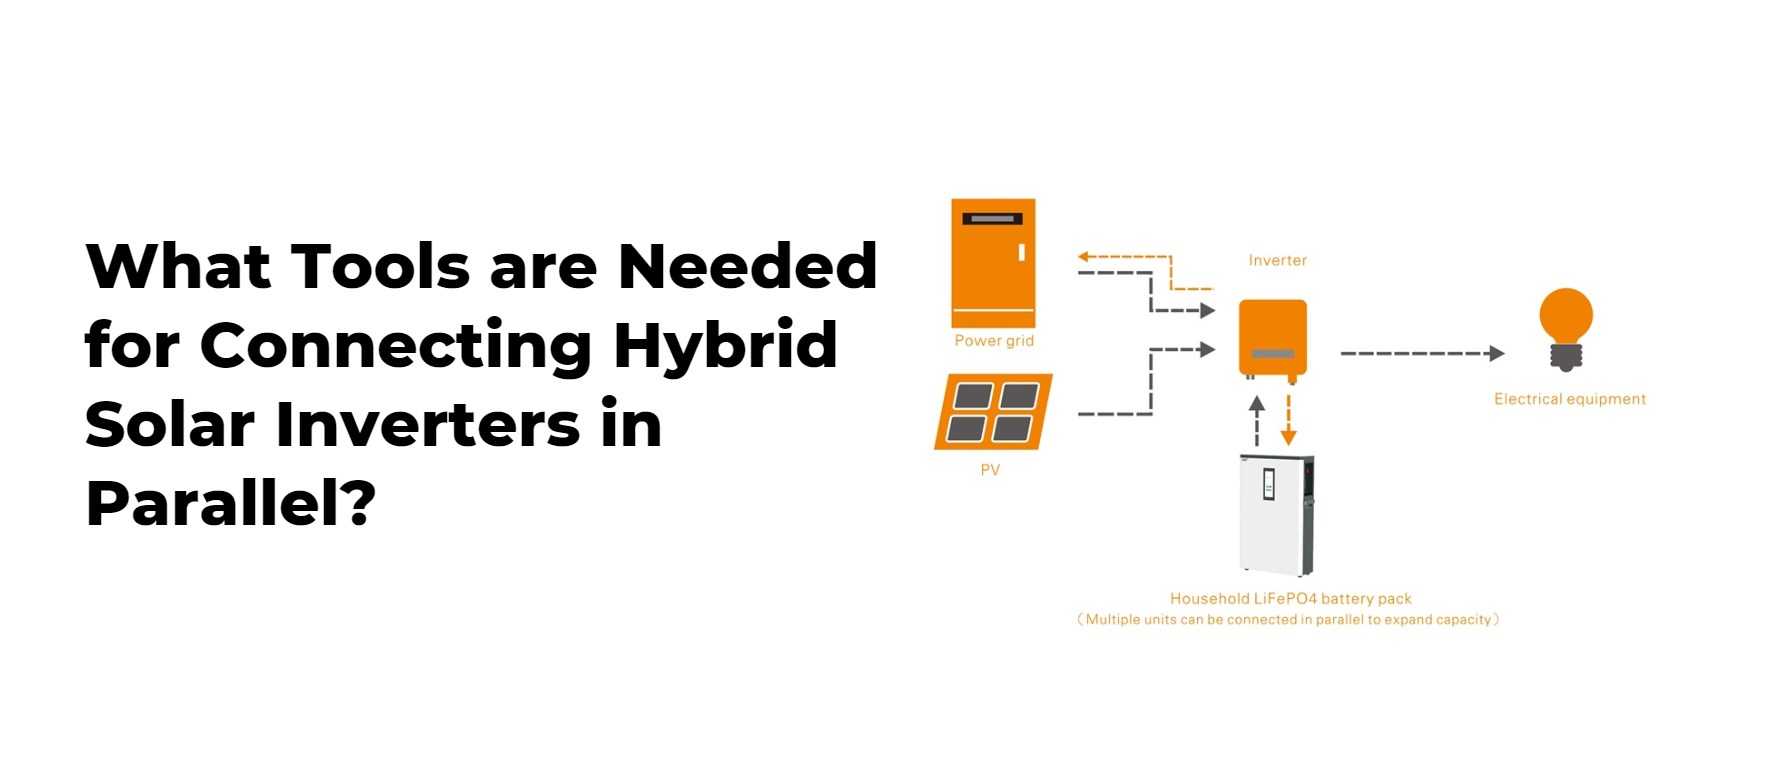
What Tools are Needed for Connecting Hybrid Solar Inverters in Parallel?

What Tools are Needed for Connecting Hybrid Solar Inverters in Parallel?

Know more:

2 solar inverters in parallel
how to connect 2 inverters in parallel
connecting inverters in parallel

Can I mix 100 watt and 200 watt solar panels?

When considering the efficiency and effectiveness of your solar power system, a common question arises: Can I mix 100 watt and 200 watt solar panels? This question is crucial for optimizing your solar energy setup and ensuring you make the most of your investment. In this guide, we will delve into the complexities of combining different wattage solar panels and how to achieve the ultimate performance from your solar array.

Understanding Solar Panel Wattage

Before diving into the specifics of mixing solar panels, it is essential to understand the significance of solar panel wattage. Wattage represents the amount of power a solar panel can generate under optimal conditions. A 100-watt panel can produce 100 watts of power, while a 200-watt panel can generate twice that amount. Despite their different capacities, both types of panels convert sunlight into electricity, but their performance characteristics can impact the overall efficiency of your system.

Technical Considerations for Mixing Panels

When mixing solar panels of different wattages, several technical considerations come into play:

1. Voltage Compatibility

The most critical factor is the voltage compatibility of the panels. Solar panels should ideally have matching voltage outputs when connected in series. Connecting panels with different voltages can lead to inefficiencies and potential damage. To ensure compatibility, check the voltage rating of each panel and confirm that they match or are within a safe range.

2. Current Matching

While voltage matching is crucial, current matching is also significant. Panels with different wattages will have different current outputs. When panels are connected in parallel, their currents add up, but their voltages remain the same. Ensure that the current rating of the panels aligns with your system’s requirements to avoid overloading your inverter or charge controller.

3. Wiring and Inverter Sizing

The wiring configuration and inverter sizing are vital considerations. When panels of different wattages are connected, it is essential to use appropriately sized wiring to handle the combined current. Additionally, the inverter should be capable of handling the total power output of the combined panels. A mismatch can lead to inefficiencies or potential system failure.

System Performance and Efficiency

Mixing panels of different wattages can impact the overall performance and efficiency of your solar power system. Here are some factors to consider:

1. Power Output Optimization

Combining 100 watt and 200 watt panels may result in a non-optimal power output if not correctly configured. To maximize performance, ensure that the panels are arranged in a way that allows for the most efficient energy conversion. This may involve using a maximum power point tracking (MPPT) charge controller to optimize energy harvest.

2. Shade and Orientation

The shade and orientation of the panels can affect their performance. Panels with different wattages should be placed to avoid shading each other and should be oriented for optimal sunlight exposure. Consistent shading or misalignment can lead to decreased efficiency and performance.

3. System Balance

Maintaining a balanced system is crucial for efficient energy production. Mixing different wattages can lead to imbalances in power production, which may impact the overall efficiency. Ensure that your system design accounts for these differences and optimizes the energy output.

Practical Tips for Mixing Solar Panels

To achieve the best results when mixing 100 watt and 200 watt solar panels, follow these practical tips:

1. Consult a Professional

Engage with a solar energy professional or electrical engineer to assess your system and provide guidance on the optimal configuration. Their expertise will help ensure that your system is designed for maximum efficiency and safety.

2. Use Compatible Components

Ensure that all system components, including the inverter, charge controller, and wiring, are compatible with the mixed wattage panels. This will help prevent any issues related to performance or safety.

3. Regular Maintenance and Monitoring

Implement a regular maintenance and monitoring routine to ensure that your solar system operates efficiently. This includes checking for any issues related to panel performance, wiring, and system components.

Advantages and Disadvantages of Mixing Panels

Advantages

  • Flexibility: Allows you to integrate different panel types based on availability and budget.
  • Cost-Effective: Potentially reduces the upfront cost of installing a solar power system.

Disadvantages

  • Reduced Efficiency: Potential for decreased system efficiency due to mismatched panels.
  • Complexity: Increased complexity in system design and maintenance.

Conclusion

In summary, mixing 100 watt and 200 watt solar panels is possible, but it requires careful consideration of several technical factors, including voltage and current compatibility, wiring, and inverter sizing. By understanding these factors and following best practices, you can optimize your solar power system for maximum efficiency and performance. For the ultimate results, consulting with a professional and ensuring that all system components are compatible will help you achieve a well-balanced and effective solar energy solution.

Can I Connect 3 Inverters Together?

Connecting multiple inverters together can be a powerful way to enhance your energy system, whether for a residential solar setup or a larger-scale commercial application. In this article, we will explore the feasibility, benefits, and technical considerations involved in connecting three inverters together.

Understanding Inverter Connectivity

What is an Inverter?

An inverter is an essential component in any solar power system, responsible for converting direct current (DC) electricity generated by solar panels into alternating current (AC) electricity used by household appliances and the electrical grid. Modern inverters are equipped with advanced features that improve efficiency and reliability, making them crucial for optimizing energy systems.

Why Connect Multiple Inverters?

Connecting multiple inverters can increase the system’s capacity, provide redundancy, and improve reliability. It also allows for greater flexibility in system design, especially in large-scale installations where a single inverter may not suffice. By integrating multiple inverters, you can better manage load demands and enhance overall performance.

Technical Considerations for Connecting Three Inverters

1. System Design and Configuration

When planning to connect three inverters, the system design must account for several factors:

  • Inverter Type: Ensure that the inverters are compatible with each other. Different types, such as string inverters, central inverters, and microinverters, have distinct operating principles and connection methods.
  • Capacity Matching: It’s crucial to match the capacities of the inverters to ensure balanced load distribution. Mismatched inverters can lead to inefficiencies and potential system failures.
  • Voltage and Current Ratings: Verify that the voltage and current ratings of the inverters align with the overall system requirements. Incorrect ratings can cause damage to the inverters and other components.

2. Electrical Wiring and Connection

Proper wiring is essential for connecting multiple inverters. Here’s what you need to consider:

  • Parallel Connection: Inverters can be connected in parallel to increase the total system capacity. Each inverter will handle a portion of the total load, and the combined output will provide higher power levels. Ensure that the wiring and breakers are rated to handle the total current from all inverters.
  • AC and DC Coupling: Decide whether to use AC coupling or DC coupling. AC coupling involves connecting the inverters to the AC side of the system, while DC coupling connects them to the DC side. AC coupling is generally simpler but may require additional equipment, such as AC combiners or load centers.
  • Isolation and Protection: Implement proper isolation techniques and protection measures, such as fuses or circuit breakers, to safeguard the system against faults and overloads.

3. Communication and Synchronization

For optimal performance, inverters need to communicate and synchronize with each other. This is especially important in systems where inverters share a common grid connection. Key considerations include:

  • Communication Protocols: Ensure that the inverters use compatible communication protocols. Many modern inverters support standard protocols such as Modbus or CAN bus for data exchange and synchronization.
  • Grid Synchronization: If the system is connected to the grid, the inverters must synchronize their outputs to match the grid frequency and voltage. This prevents issues such as power quality problems or system instability.

Benefits of Connecting Three Inverters

1. Increased System Capacity

Connecting three inverters allows for a significant increase in system capacity. By distributing the load among multiple inverters, you can achieve higher power outputs and support more appliances or equipment.

2. Improved Reliability and Redundancy

Multiple inverters provide redundancy in case of a failure. If one inverter fails, the remaining inverters can continue to operate, minimizing the impact on overall system performance and reducing downtime.

3. Enhanced Flexibility

Using three inverters offers greater design flexibility. You can tailor the system to meet specific energy needs and adapt to changing demands. For instance, you can install additional inverters later as your energy requirements grow.

4. Better Load Management

With multiple inverters, you can better manage the load distribution across the system. This helps in optimizing performance and ensuring that no single inverter is overloaded, which can enhance the system’s longevity and efficiency.

Challenges and Considerations

1. Complexity of Installation

Connecting multiple inverters introduces additional complexity to the installation process. Proper planning, wiring, and configuration are crucial to ensure a successful setup. It may be beneficial to work with a professional installer to handle the intricacies of the system.

2. Cost Implications

While connecting multiple inverters can provide significant benefits, it also involves higher initial costs. Consider the cost of the inverters, installation, and any additional components required for a seamless integration.

3. Maintenance and Monitoring

Maintaining and monitoring a system with multiple inverters requires careful attention. Regular checks and updates are necessary to ensure that all inverters operate optimally and that any issues are addressed promptly.

Conclusion

Connecting three inverters together can be a highly effective strategy for enhancing your energy system’s capacity, reliability, and flexibility. By understanding the technical requirements and benefits, you can design a system that meets your needs and operates efficiently. Ensure that you consider the complexities involved and consult with experts to achieve the best results.

For anyone contemplating a multi-inverter setup, meticulous planning and execution are key to harnessing the full potential of your energy system. Embrace the opportunity to maximize your energy output and enjoy the benefits of a well-designed and reliable solar power system.

Can I use 2 inverters in parallel?

In the realm of renewable energy systems and off-grid power setups, the question of whether two inverters can be used in parallel is not uncommon. This consideration is crucial for maximizing the efficiency and reliability of power systems, particularly in larger installations or those requiring increased capacity. In this detailed guide, we will delve into the complexities of paralleling inverters, addressing the technical aspects, benefits, and considerations to ensure optimal performance and safety.

Understanding Inverter Paralleling

Inverter paralleling involves connecting multiple inverters to operate simultaneously, sharing the load and increasing overall system capacity. This approach is often employed in systems where a single inverter cannot meet the power demands or when redundancy is required to enhance system reliability.

Types of Inverters

Before exploring the specifics of paralleling inverters, it’s important to distinguish between different types of inverters:

  • String Inverters: Typically used in solar PV systems, string inverters convert DC power from solar panels into AC power. These inverters are generally not designed to be used in parallel unless specified by the manufacturer.
  • Microinverters: Installed on each solar panel, microinverters convert DC to AC at the panel level. While they are not usually paired in parallel, their modular nature allows for easy system expansion.
  • Hybrid Inverters: These inverters can handle both solar energy and battery storage, often featuring built-in batteries or connections for external battery banks. They are sometimes designed for parallel operation.
  • Grid-Tie Inverters: Designed to feed power into the grid, these inverters need to synchronize with the grid frequency and voltage. Their parallel operation requires strict adherence to grid standards.

Technical Considerations for Paralleling Inverters

  1. Synchronization: For two inverters to operate in parallel, they must be perfectly synchronized. This means their output voltage, frequency, and phase must match precisely. Many modern inverters come with built-in synchronization features, but this is not universal.
  2. Load Sharing: When inverters are paralleled, they must share the load equally. This requires sophisticated load-sharing algorithms to prevent one inverter from being overburdened while the other remains underutilized. This functionality is often managed by dedicated parallel operation controllers.
  3. Communication: Inverters used in parallel must communicate with each other to ensure they are operating correctly and in harmony. This communication is typically achieved through dedicated communication ports or a central controller.
  4. Safety Mechanisms: Paralleling inverters introduces complexities in system protection. Adequate safety mechanisms must be in place to prevent issues such as overloading, short circuits, or potential damage to the inverters.

Benefits of Using Two Inverters in Parallel

  1. Increased System Capacity: The primary advantage of paralleling inverters is the ability to increase the overall power output of the system. This is particularly beneficial for larger installations where a single inverter cannot handle the required load.
  2. Redundancy: Using multiple inverters provides a level of redundancy. If one inverter fails, the other(s) can continue to operate, minimizing downtime and ensuring continuous power supply.
  3. Scalability: Paralleling inverters allows for flexible system expansion. Additional inverters can be added as power needs grow, making it easier to scale the system without replacing existing components.
  4. Improved Efficiency: In some cases, paralleling inverters can enhance overall system efficiency. This is because each inverter can operate at its optimal efficiency level rather than being pushed to its limits.

Challenges and Solutions

  1. Complex Installation: Paralleling inverters adds complexity to the installation process. It requires careful planning and configuration to ensure that all inverters are correctly synchronized and communicate effectively.Solution: Engage a qualified installer with experience in parallel inverter systems to ensure a proper setup and avoid potential issues.
  2. Cost: The cost of additional inverters and the associated hardware for paralleling can be significant.Solution: Evaluate the cost-benefit ratio and consider whether the increased capacity and reliability justify the investment. In some cases, the long-term benefits outweigh the initial costs.
  3. Maintenance: Maintaining a parallel inverter system may be more challenging compared to a single inverter setup.Solution: Implement regular maintenance schedules and monitor system performance to detect and address any issues promptly.

Best Practices for Paralleling Inverters

  1. Select Compatible Inverters: Ensure that the inverters you choose are compatible with each other and are designed for parallel operation. Consult the manufacturer’s specifications and recommendations.
  2. Use Quality Components: Invest in high-quality components, such as communication cables and controllers, to ensure reliable operation and longevity of the system.
  3. Implement Proper Monitoring: Utilize advanced monitoring systems to keep track of the performance of each inverter and the overall system. This helps in identifying issues early and maintaining optimal performance.
  4. Adhere to Safety Standards: Follow all relevant safety standards and guidelines to ensure that the paralleling of inverters is carried out safely and effectively.

Conclusion

Paralleling two inverters can be a highly effective strategy for enhancing the capacity, reliability, and scalability of power systems. By understanding the technical considerations, benefits, and challenges associated with this approach, we can ensure that our systems operate efficiently and meet our power needs effectively. Careful planning, proper installation, and ongoing maintenance are crucial for maximizing the benefits of using multiple inverters in parallel.

Certainly! Let’s revise and provide a more detailed explanation:

When connecting two inverters in parallel, it is essential to ensure compatibility in voltage and frequency. Let’s consider two inverters with specific specifications:

Inverter 1:

  • Voltage: 120V
  • Frequency: 60Hz

Inverter 2:

  • Voltage: 120V
  • Frequency: 60Hz

To parallel connect these inverters, follow these detailed steps:

  1. Voltage Matching:
    • Confirm that both inverters have the same output voltage. In this case, both Inverter 1 and Inverter 2 output 120V, meeting the requirement for voltage matching.
  2. Frequency Matching:
    • Verify that the frequency output of both inverters is identical. Here, both Inverter 1 and Inverter 2 have an output frequency of 60Hz, satisfying the condition for frequency matching.
  3. Parallel Connection Kit:
    • Check if the inverters come with a parallel connection kit provided by the manufacturer. These kits are designed to facilitate proper synchronization between the inverters, ensuring seamless parallel operation.
  4. Synchronization:
    • In the absence of a parallel connection kit, manually synchronize the inverters. This involves matching the phase and frequency of the output from both inverters. Failure to synchronize the inverters may result in power imbalances and potential damage to connected devices.
  5. Load Sharing:
    • Confirm that the connected load is evenly distributed between the two inverters. Proper load sharing prevents overloading of one inverter while the other remains underutilized, optimizing the performance of the parallel system.
  6. Consult Manufacturer Guidelines:
    • Always refer to the user manual or guidelines provided by the inverter manufacturer for specific instructions on parallel operation. Manufacturers may offer additional details or precautions specific to your equipment.

Connecting inverters in parallel can increase overall power capacity and enhance system reliability. However, it is crucial to follow the manufacturer’s guidelines diligently to avoid potential issues or damage to the equipment. Whether using a parallel connection kit or manually synchronizing the inverters, attention to detail is key to ensuring a seamless and efficient parallel connection.

FAQs on Golf Cart Safety: Tips for a Secure Day on the Green

Golf carts have become an integral part of the golf experience, providing both convenience and enjoyment. However, their widespread use necessitates a thorough understanding of safety practices to ensure a secure and enjoyable day on the green. In this comprehensive guide, we will delve into crucial aspects of golf cart safety, addressing common questions and offering practical tips to help you navigate the course with confidence.

1. What Are the Basic Safety Rules for Golf Cart Operation?

Ensuring safety while operating a golf cart begins with adhering to fundamental operational guidelines. Here are essential rules to follow:

  • Obey Speed Limits: Golf carts should not exceed the recommended speed limits, typically between 15 to 20 mph. Excessive speed can lead to loss of control and increase the risk of accidents.
  • Stay on Designated Paths: Utilize the golf cart paths and avoid driving on the grass or non-designated areas. This practice helps prevent turf damage and reduces the risk of collisions.
  • Avoid Sharp Turns: Make gentle turns to maintain stability. Sharp turns can cause the cart to tip over or lose control.
  • Keep Hands and Feet Inside: Always keep your hands and feet inside the cart while it is in motion to avoid accidents or injuries.
  • Use Turn Signals: When navigating intersections or changing directions, use the cart’s turn signals to alert other drivers and pedestrians.

2. How Can I Ensure the Golf Cart Is in Good Working Condition?

Regular maintenance is key to ensuring your golf cart remains in optimal working condition. Here are important maintenance tips:

  • Check Tire Pressure: Inspect the tire pressure regularly and ensure it is within the manufacturer’s recommended range. Proper tire pressure enhances stability and traction.
  • Inspect Brakes: Test the brakes before each use. Ensure they engage smoothly and effectively to prevent potential accidents.
  • Monitor Battery Health: Regularly check the battery’s charge level and connections. Replace the battery if it shows signs of deterioration to avoid unexpected breakdowns.
  • Examine Lights and Signals: Ensure that all lights, including headlights, tail lights, and turn signals, are functioning correctly. This is crucial for visibility and communication with other drivers.
  • Keep the Cart Clean: Regularly clean the cart to prevent dirt and debris from affecting its performance. A clean cart also allows for better inspection of potential issues.

3. What Are the Key Safety Practices for Passengers?

Passenger safety is just as critical as driver safety. Adhering to the following practices ensures everyone’s well-being:

  • Seat Belts: If the golf cart is equipped with seat belts, ensure that all passengers are properly secured before the cart begins moving.
  • Limit the Number of Passengers: Adhere to the manufacturer’s capacity limits. Overloading the cart can impair handling and stability.
  • Remain Seated: Passengers should remain seated while the cart is in motion. Standing or moving around increases the risk of falling or causing a sudden shift in weight.
  • Hold Onto Handles: If available, use the provided handrails or handles for additional stability and support while the cart is in motion.

4. How Can I Safely Navigate the Golf Course?

Navigating the golf course safely involves understanding and respecting the course layout and other players. Consider the following tips:

  • Observe Course Rules: Follow all course-specific rules regarding cart usage, including restricted areas and designated paths. Ignoring these rules can lead to accidents or course damage.
  • Communicate with Other Golfers: Be aware of other golfers on the course and communicate your intentions, especially when approaching tees or greens.
  • Avoid Wet Areas: Refrain from driving through wet or muddy areas, as they can be slippery and increase the risk of skidding or getting stuck.
  • Slow Down on Hilly Terrain: Exercise caution when driving on inclines or declines. Reduce speed and maintain control to prevent the cart from tipping over or losing traction.

5. What Should I Do in Case of an Emergency?

Preparedness for emergencies is crucial for golf cart safety. Here’s what you should do in case of an emergency:

  • Know Emergency Contacts: Familiarize yourself with the golf course’s emergency contact numbers and procedures. Keep a phone handy to quickly reach out for assistance if needed.
  • Have a First Aid Kit: Carry a basic first aid kit in the golf cart. This kit should include items such as bandages, antiseptics, and pain relievers.
  • Report Accidents: If an accident occurs, report it immediately to the golf course management. Document the incident and exchange information with any other parties involved.

6. How Can I Educate Others About Golf Cart Safety?

Promoting golf cart safety involves educating others and fostering a culture of awareness. Here’s how you can help:

  • Share Safety Guidelines: Provide fellow golfers with information on golf cart safety practices, either through informal discussions or written materials.
  • Lead by Example: Demonstrate safe driving habits and adherence to safety rules. Your actions can encourage others to follow suit.
  • Participate in Safety Programs: Engage in or promote safety programs and workshops organized by golf courses or local communities.

7. What Are the Common Misconceptions About Golf Cart Safety?

Addressing common misconceptions can improve safety awareness. Here are a few myths debunked:

  • Myth: Golf Carts Are Slow and Safe: Even though golf carts are slower than cars, they can still cause significant injuries if not operated safely. Always follow safety guidelines regardless of speed.
  • Myth: Golf Carts Are Only for Golf Courses: Golf carts are increasingly used in various environments, including communities and events. Safety practices apply wherever they are used.
  • Myth: Golf Cart Accidents Are Rare: While golf cart accidents may be less frequent than automobile accidents, they do occur and can be serious. Consistent safety measures are essential to prevent incidents.

8. How Can I Stay Updated on Golf Cart Safety Practices?

Staying informed about the latest safety practices helps ensure ongoing compliance. Here’s how you can keep updated:

Conclusion

Golf cart safety is paramount to ensuring an enjoyable and secure experience on the course. By adhering to established safety practices, maintaining your cart, and staying informed, you can navigate the green with confidence and reduce the risk of accidents. Remember that safety is a shared responsibility among all golf cart users, and promoting awareness can lead to a safer and more pleasant golfing environment for everyone.

Montana Golf Cart and LSV Laws: Navigating the Roads in The Treasure State

Navigating the unique roadways of Montana with a golf cart or low-speed vehicle (LSV) requires a comprehensive understanding of state-specific regulations. In the Treasure State, these vehicles offer both practical and recreational benefits, but they come with distinct legal requirements that ensure safety and compliance. This guide provides a detailed overview of Montana’s laws regarding golf carts and LSVs, aiming to deliver a thorough understanding to both residents and visitors.

Understanding Montana’s Legal Framework for Golf Carts and LSVs

Golf Carts in Montana

In Montana, the use of golf carts is primarily regulated at the local level, meaning that city and county ordinances play a crucial role. Here’s a breakdown of the key points regarding golf carts:

  • Local Ordinances: Most Montana municipalities have established their own regulations governing golf cart use. These regulations may include restrictions on where golf carts can operate, required safety equipment, and age restrictions for drivers.
  • Operation on Public Roads: Generally, golf carts are not permitted on state highways or main roads. They are usually restricted to private property or designated areas within city limits.
  • Safety Requirements: When allowed, golf carts must adhere to specific safety standards, which might include functioning lights, reflective devices, and safety belts. However, exact requirements can vary by locality.
  • Registration and Insurance: Unlike motor vehicles, golf carts typically do not require registration or insurance in most areas, though some jurisdictions may impose these requirements.

Low-Speed Vehicles (LSVs) in Montana

Low-speed vehicles, also known as LSVs, have more defined legal standards compared to golf carts. These vehicles, which include models such as certain electric cars and utility vehicles, must comply with both federal and state regulations:

  • Federal Standards: LSVs are subject to federal safety standards under the National Highway Traffic Safety Administration (NHTSA). These standards ensure that LSVs are equipped with safety features such as seat belts, lights, and turn signals.
  • State Regulations: Montana law stipulates that LSVs can operate on roads with speed limits of 35 mph or lower. This restriction helps to ensure that LSVs are used in safe environments where their lower speeds do not pose a hazard.
  • Registration and Insurance: Unlike golf carts, LSVs must be registered with the Montana Motor Vehicle Division. Additionally, LSV owners are required to carry insurance to cover potential damages or accidents.

Operational Guidelines for Golf Carts and LSVs

Golf Cart Operation

  1. Designated Areas: Golf carts should only be operated in areas where local laws permit. This typically includes private communities, golf courses, and specific city streets.
  2. Driver’s Age and Licensing: Many local regulations mandate that drivers of golf carts be at least 16 years old. In some places, a special golf cart license or permit may be required.
  3. Safety Protocols: Operators must adhere to safety protocols, including using headlights at night, maintaining a safe speed, and ensuring all passengers are seated and secured.

LSV Operation

  1. Road Use: LSVs can operate on roads with speed limits up to 35 mph, but not on highways or roads with higher speed limits. They are also permitted on certain streets within municipalities that have designated LSV zones.
  2. Equipment Requirements: LSVs must be equipped with specific safety features, including operational headlights, turn signals, brake lights, and a rearview mirror. These features are designed to meet both state and federal safety standards.
  3. Driver’s Licensing: LSV operators must possess a valid driver’s license. Additionally, the vehicle must be registered and insured according to state laws.

Local Variations and Enforcement

Montana’s vast geographical and cultural diversity means that local regulations can vary significantly. It is crucial for residents and visitors to consult local ordinances to ensure compliance. This can typically be done through city or county websites or local government offices.

Penalties for Non-Compliance

Failure to adhere to golf cart and LSV regulations can result in various penalties, including fines, impoundment of the vehicle, and legal liability in case of accidents. Ensuring that all legal requirements are met not only promotes safety but also helps avoid these potential consequences.

Conclusion

Navigating Montana’s regulations for golf carts and low-speed vehicles requires careful attention to both local ordinances and state laws. While golf carts are more restricted and regulated at the local level, LSVs must adhere to a broader set of state and federal standards. Understanding these requirements ensures that residents and visitors can enjoy these vehicles safely and legally across the diverse landscapes of Montana.

For the latest updates and specific local regulations, consulting local authorities or official resources is recommended. This proactive approach helps in staying compliant and ensuring a smooth and enjoyable experience on Montana’s roads.

FAQs

What is the difference between a golf cart and an LSV in Montana?
In Montana, golf carts are generally used for private property and have fewer regulatory requirements. Low-Speed Vehicles (LSVs) are designed for public roads, require specific safety equipment, and must adhere to more stringent regulations.

Do I need a driver’s license to operate a golf cart or LSV in Montana?
Yes, you need a valid driver’s license to operate an LSV on public roads in Montana. For golf carts, a driver’s license is required if they are used on public roads; otherwise, one is not needed on private property.

How do I register a golf cart or LSV in Montana?
To register an LSV in Montana, visit the local Motor Vehicle Division (MVD) office with proof of ownership and complete the registration process. Golf carts are typically not required to be registered unless used on public roads.

Is insurance required for golf carts and LSVs in Montana?
Insurance is required for LSVs used on public roads in Montana, covering liability for injury and property damage. Golf carts do not need insurance unless they are driven on public roads.

What safety equipment is required for street-legal golf carts and LSVs in Montana?
Street-legal golf carts in Montana must have headlights, taillights, turn signals, a horn, and rearview mirrors. LSVs require additional equipment such as a windshield, seat belts, and a parking brake.

Where can I legally drive a golf cart or LSV in Montana?
Golf carts can be driven on private property and on public roads with speed limits of 25 mph or less if permitted. LSVs can be driven on public roads with speed limits of up to 35 mph, provided they meet all registration and safety requirements.

What are the speed limits for golf carts and LSVs on public roads in Montana?
Golf carts are limited to roads with speed limits of 25 mph or less. LSVs can be driven on roads with speed limits up to 35 mph in Montana.

Are there any exceptions or special cases for golf cart and LSV use in Montana?
Exceptions may exist for local ordinances or specific communities allowing golf carts or LSVs in areas with different rules. Always check local regulations for any special provisions or allowances.

How do local ordinances affect the use of golf carts and LSVs in Montana?
Local ordinances can impose additional restrictions or provide special allowances for golf carts and LSVs, such as specific usage areas or extra safety requirements. Consult local regulations for details on how they affect use.

What are the penalties for violating golf cart and LSV laws in Montana?
Penalties for violating golf cart and LSV laws in Montana can include fines, legal penalties, and possible impoundment of the vehicle. Violations of registration, insurance, or safety requirements can lead to enforcement actions.

Links

Montana Department of Transportation

National Highway Traffic Safety Administration (NHTSA)

Oklahoma Golf Cart and LSV Laws: Navigating the Road Safely

In Oklahoma, the regulations governing golf carts and Low-Speed Vehicles (LSVs) are crucial for ensuring safety and compliance on the roads. These regulations are designed to address the unique needs of these vehicles while maintaining road safety and order. We aim to provide an in-depth analysis of these laws to help you navigate them effectively.

Golf Carts: Definition and Usage

Golf carts are primarily designed for use on golf courses but are increasingly being used for personal transport in various communities. According to Oklahoma law, a golf cart is defined as a motor vehicle designed for operation on a golf course and not capable of speeds exceeding 20 miles per hour.

Legal Requirements for Golf Carts

In Oklahoma, the use of golf carts on public roads is governed by specific local ordinances. These ordinances may vary from one municipality to another but generally include:

  • Registration: Some cities require golf carts to be registered with the local authorities.
  • Insurance: Adequate liability insurance is often mandated.
  • Driver’s License: Operators usually need a valid driver’s license.
  • Safety Equipment: Golf carts must be equipped with safety features such as lights, horns, and reflective markings.

Operation Restrictions

Golf carts are generally restricted to specific types of roads and areas:

  • Speed Limits: They can only operate on roads with a maximum speed limit of 25 miles per hour.
  • Roadways: Use is often restricted to residential streets or designated areas.

Low-Speed Vehicles (LSVs): An Overview

Low-Speed Vehicles (LSVs) are motor vehicles designed to travel at speeds between 20 and 25 miles per hour. Unlike golf carts, LSVs are built to meet federal safety standards and can be used more broadly.

Legal Requirements for LSVs

The use of LSVs in Oklahoma is regulated by both state and federal laws. The key requirements include:

  • Federal Standards: LSVs must comply with federal safety standards, which include features such as seat belts, headlights, and turn signals.
  • Registration and Title: LSVs must be registered with the Oklahoma Department of Public Safety (DPS) and carry a title.
  • Insurance: Liability insurance is required, and coverage must meet state minimum requirements.
  • Driver’s License: Operators must have a valid driver’s license.

Operational Guidelines

LSVs are permitted on roads where the speed limit does not exceed 35 miles per hour. They are also allowed on certain highways and roads, provided they follow specific operational guidelines:

  • Roadway Use: LSVs can be used on roads and streets, but not on highways where higher speeds are expected.
  • Lighting: They must be equipped with proper lighting and reflectors.

Differences Between Golf Carts and LSVs

Understanding the differences between golf carts and LSVs is essential for compliance and safety:

  • Speed Capabilities: Golf carts are limited to lower speeds, while LSVs can operate up to 25 miles per hour.
  • Safety Standards: LSVs adhere to stricter federal safety standards compared to golf carts.
  • Operational Areas: Golf carts have more restrictive operating areas, whereas LSVs have more flexibility in road usage.

Safety Considerations

Safety is paramount when operating golf carts or LSVs. Consider the following safety tips:

  • Regular Maintenance: Ensure that both golf carts and LSVs are regularly maintained and inspected for safety.
  • Use of Safety Gear: Always use appropriate safety gear, including seat belts for LSVs.
  • Awareness of Surroundings: Operators should be vigilant and aware of their surroundings, especially when sharing the road with other vehicles.

Compliance with Local Laws

Adhering to local ordinances is crucial for avoiding fines and ensuring safe operation. Here’s how to stay compliant:

  • Check Local Regulations: Before operating a golf cart or LSV, check with local authorities for specific regulations and requirements.
  • Obtain Necessary Permits: Some municipalities require special permits or registrations for these vehicles.
  • Adhere to Safety Protocols: Follow all local safety protocols, including the use of reflective gear and compliance with speed limits.

Future Trends and Changes

Regulations surrounding golf carts and LSVs are subject to change. Keep informed about:

  • Legislative Updates: Stay updated on any new legislation or amendments that may affect the use of these vehicles.
  • Technological Advances: New technologies may influence safety standards and operational guidelines.

Conclusion

Navigating Oklahoma’s golf cart and LSV laws requires a thorough understanding of both state and local regulations. By adhering to these laws and focusing on safety, you can ensure a compliant and enjoyable experience with your golf cart or LSV. For any further information or specific queries, consult with local authorities or legal experts.

FAQs

What are the age requirements to drive a golf cart in Oklahoma?
In Oklahoma, drivers must be at least 16 years old and possess a valid driver’s license to operate a golf cart on public roads.

Can golf carts be driven on public roads?
Yes, golf carts can be driven on public roads in Oklahoma, but they must be used on roads with speed limits of 25 mph or less and comply with local ordinances.

What equipment is required for an LSV in Oklahoma?
Low-Speed Vehicles (LSVs) in Oklahoma must have headlights, taillights, turn signals, brakes, a horn, mirrors, and a windshield. They must also be registered with the Oklahoma Tax Commission.

Are golf carts allowed to operate at night?
Golf carts are not typically allowed to operate at night in Oklahoma unless they are equipped with proper lighting and comply with local regulations.

How do I register my LSV in Oklahoma?
To register an LSV in Oklahoma, visit the Oklahoma Tax Commission with proof of ownership, proof of insurance, and a completed registration form.

What are the penalties for driving a golf cart under the influence?
Driving a golf cart under the influence in Oklahoma can lead to penalties similar to those for motor vehicles, including fines, license suspension, and possible jail time.

What local laws should I be aware of regarding golf carts?
Local laws may vary but often include restrictions on operating golf carts on certain roads, requirements for safety equipment, and regulations for nighttime use. Check with local authorities for specific rules.

Links

Oklahoma Department of Transportation

National Highway Traffic Safety Administration (NHTSA)

Oregon Golf Cart and LSV Laws: Navigating Roads Responsibly

Navigating the intricacies of Oregon’s golf cart and low-speed vehicle (LSV) laws is crucial for ensuring both compliance and safety on the roads. As the popularity of these vehicles rises, understanding the legal framework governing their use becomes imperative. This comprehensive guide delves into the regulations and requirements for golf carts and LSVs in Oregon, offering valuable insights for operators and enthusiasts alike.

Understanding Golf Carts and LSVs

Golf carts and LSVs, though often used interchangeably, have distinct differences. Golf carts are typically designed for use on golf courses and have limited speed capabilities. In contrast, low-speed vehicles (LSVs) are designed for road use and must meet specific safety standards.

Golf Carts: Definition and Regulations

In Oregon, golf carts are defined by their use and design. They are generally characterized by:

  • Maximum Speed: Golf carts typically have a maximum speed of 15 to 25 mph.
  • Use: They are primarily intended for use on golf courses and private properties.

Despite their limitations, golf carts must adhere to certain regulations when used on public roads:

  • Street Use: Golf carts are not generally permitted on public roads unless specifically authorized by local ordinances.
  • Equipment: When authorized, they must be equipped with safety features such as lights, reflectors, and an operable horn.

Low-Speed Vehicles (LSVs): Definition and Regulations

Low-speed vehicles (LSVs) are subject to more stringent regulations compared to golf carts due to their higher speed capabilities and road use. LSVs must:

  • Speed Requirements: Operate at speeds of 20 to 25 mph.
  • Safety Standards: Meet federal safety standards for motor vehicles, including features like seat belts, headlights, taillights, and turn signals.
  • Registration: Be registered with the Oregon Department of Transportation (ODOT) and display appropriate license plates.

Local Ordinances and Restrictions

Understanding local ordinances is crucial, as municipalities in Oregon may impose additional restrictions or permissions regarding golf carts and LSVs. For example:

  • Golf Carts: Some cities may allow golf carts on specific local roads or paths. Operators must verify local regulations before use.
  • LSVs: Local ordinances might dictate specific routes or areas where LSVs can operate. Operators should check with local authorities for applicable rules.

Safety and Compliance

Ensuring safety and compliance with Oregon’s regulations involves several key practices:

Golf Cart Safety

  • Use Designated Areas: Operate golf carts only in areas where their use is permitted, such as golf courses or private properties.
  • Compliance: Ensure the golf cart complies with any local regulations if used on public roads.

LSV Compliance

  • Adherence to Safety Standards: Ensure that the LSV meets all federal safety standards. This includes features such as:
    • Functional Lighting: Headlights, taillights, and turn signals.
    • Safety Equipment: Seat belts and rearview mirrors.
    • Vehicle Inspection: Regular maintenance checks to ensure roadworthiness.
  • Insurance and Registration: Maintain proper insurance and ensure the vehicle is registered with ODOT.

Environmental Considerations

Both golf carts and LSVs offer environmentally friendly alternatives to traditional vehicles:

  • Electric Models: Many golf carts and LSVs are electric, reducing emissions and promoting sustainability.
  • Efficiency: Their lower speed and energy-efficient designs contribute to reduced environmental impact.

Conclusion

Navigating the regulations surrounding golf carts and low-speed vehicles in Oregon requires a thorough understanding of both state and local laws. By adhering to these regulations, operators can ensure their vehicles are used safely and legally, contributing to a positive driving experience and responsible road usage. Always stay informed about any changes in local ordinances and maintain compliance with all safety and registration requirements to enjoy the benefits of these versatile vehicles responsibly.

FAQs

What is the difference between a golf cart and an LSV in Oregon?
In Oregon, golf carts are generally designed for private property use and have fewer safety requirements. Low-Speed Vehicles (LSVs) are more regulated, designed for public roads, and must meet specific safety standards, including higher equipment requirements.

What safety equipment is required for street-legal golf carts and LSVs in Oregon?
Street-legal golf carts in Oregon must have headlights, taillights, turn signals, a horn, and rearview mirrors. LSVs must also meet these requirements and include additional safety features such as a windshield, seat belts, and a parking brake.

Do I need a driver’s license to operate a golf cart or LSV in Oregon?
Yes, you need a valid driver’s license to operate an LSV on public roads in Oregon. For golf carts, a driver’s license is required if they are driven on public roads. On private property, a driver’s license is not necessary.

How do I register a golf cart or LSV in Oregon?
To register a golf cart or LSV in Oregon, visit the Oregon DMV. Provide proof of ownership, complete registration forms, and meet any insurance requirements. LSVs require more detailed registration than golf carts.

Is insurance required for golf carts and LSVs in Oregon?
Insurance is required for LSVs driven on public roads in Oregon, covering liability for bodily injury and property damage. Golf carts may also need insurance if used on public roads, depending on local regulations.

Where can I legally drive a golf cart or LSV in Oregon?
Golf carts can be driven on public roads with speed limits of 25 mph or less, and on private property. LSVs can be driven on roads with speed limits of up to 35 mph, provided they are registered and meet safety requirements.

What are the speed limits for golf carts and LSVs on public roads in Oregon?
Golf carts are limited to roads with speed limits of 25 mph or less. LSVs can be driven on public roads with speed limits up to 35 mph in Oregon.

What are the penalties for violating golf cart and LSV laws in Oregon?
Penalties for violating golf cart and LSV laws in Oregon include fines, legal penalties, and potential impoundment of the vehicle. Violations can also result in enforcement actions and additional legal consequences.

Are there any exceptions or special cases for golf cart and LSV use in Oregon?
Exceptions or special cases may apply, such as specific local regulations or designated areas where golf carts or LSVs can be used. Always check local ordinances for any unique rules or allowances.

How do local ordinances affect the use of golf carts and LSVs in Oregon?
Local ordinances can impose additional restrictions or allowances on the use of golf carts and LSVs, such as specific areas where they can be driven or extra safety requirements. It is important to consult local regulations for detailed information.

Links

Oregon Department of Transportation

National Highway Traffic Safety Administration (NHTSA)

North Dakota Golf Cart and LSV Laws: Navigating Road Regulations

In North Dakota, golf carts and Low-Speed Vehicles (LSVs) have specific laws governing their operation on public roads. Operators must ensure that their vehicles meet safety standards, including having proper lighting and signage. Additionally, drivers must possess a valid driver’s license, and local ordinances may dictate where these vehicles can be used.

Latest News

  • Legislative Updates: Recent changes in North Dakota legislation have clarified the requirements for golf carts and LSVs, focusing on safety and compliance with road regulations.
  • Local Ordinance Variations: Different municipalities are establishing their own rules regarding the use of golf carts and LSVs, which can vary significantly across the state.
  • Increased Popularity of LSVs: As more residents seek eco-friendly transportation options, the demand for golf carts and LSVs is rising, prompting discussions about infrastructure improvements.
  • Safety Awareness Campaigns: Local authorities are launching initiatives to educate residents about the laws governing golf carts and LSVs to promote safe driving practices.

Redway Expert Comment

At Redway Battery, we understand the importance of adhering to North Dakota’s regulations for golf carts and LSVs. Our lithium LiFePO4 batteries provide reliable power for these vehicles, enhancing performance while ensuring compliance with safety standards. We encourage all operators to stay informed about local laws to ensure a safe and enjoyable driving experience.”

Understanding North Dakota’s Golf Cart and LSV Laws

1. Definition of Golf Carts and LSVs

Golf Carts

In North Dakota, golf carts are typically defined as small, motorized vehicles designed primarily for use on golf courses but can also be used on public roads if they meet specific criteria.

Low-Speed Vehicles (LSVs)

LSVs are defined as four-wheeled vehicles that can reach speeds between 20 to 25 mph. These vehicles are designed for use on public roads with speed limits of 35 mph or lower.

2. Licensing Requirements

To operate a golf cart or LSV legally in North Dakota:

  • Driver’s License: Operators must possess a valid driver’s license.
  • Age Restrictions: Some local jurisdictions may impose age restrictions on who can drive these vehicles.

3. Required Safety Equipment

North Dakota law mandates that both golf carts and LSVs be equipped with certain safety features:

Lighting Requirements

  • Headlights: Must be functional for visibility during low-light conditions.
  • Taillights: Required to alert other drivers when stopping or turning.

Turn Signals

Turn signals are necessary for indicating lane changes or turns to enhance safety on public roads.

Reflectors

Reflectors should be installed on the rear of the vehicle to improve visibility at night.

4. Registration Process

While registration requirements may vary by municipality, many areas in North Dakota require golf carts and LSVs to be registered:

  • Title Application: Owners must apply for a title through their local Department of Motor Vehicles (DMV).
  • Registration Fee: A small fee may be required for registration, which varies by locality.

5. Local Ordinances and Restrictions

Operators should familiarize themselves with local ordinances regarding where they can operate their golf carts or LSVs:

Designated Roads

Many towns allow these vehicles on roads with speed limits of 35 mph or lower but may restrict access to certain areas.

Parking Regulations

Local laws may dictate where golf carts and LSVs can park, often requiring designated parking spaces.

6. Insurance Considerations

While insurance is not universally required for golf carts in North Dakota, it is advisable to have liability coverage. This protects operators from potential costs associated with accidents or damages while using their vehicles on public roads.

7. Safety Tips for Operators

To ensure a safe driving experience while operating a golf cart or LSV in North Dakota, consider these essential safety tips:

Follow Traffic Laws

Operators must obey all traffic signals and signs as they would in any motor vehicle.

Use Hand Signals

If your turn signals are not functioning correctly, use hand signals to indicate turns or lane changes.

Stay Visible

Wearing bright clothing and adding reflective materials to your vehicle can enhance visibility during the day and at night.

Avoid Distracted Driving

Stay focused while driving by avoiding distractions such as mobile devices or loud music that may divert your attention from the road.

8. Environmental Impact of Golf Carts and LSVs

As more individuals turn to golf carts and LSVs as alternative modes of transportation, it’s essential to consider their environmental impact. Electric models produce zero emissions during operation, contributing positively to air quality compared to traditional gas-powered vehicles.

9. Future Developments in Golf Cart Regulations

As the popularity of golf carts and LSVs continues to rise in North Dakota, ongoing discussions regarding regulations will likely emerge. Local governments may implement additional infrastructure improvements, such as dedicated lanes for these vehicles or expanded access routes.

Conclusion

Navigating the laws surrounding golf carts and LSVs in North Dakota is essential for ensuring compliance and promoting safety on public roads. By adhering to licensing requirements, equipping your vehicle with necessary safety features, understanding local ordinances, and prioritizing safe driving practices, you can enjoy the benefits of using a golf cart or LSV while contributing positively to your community. As this mode of transportation becomes more popular, staying informed about regulations will ensure a safe and enjoyable experience on the road.

FAQs

Can you drive a golf cart on the road in North Dakota?
Yes, you can drive a golf cart on designated roads in North Dakota if local authorities permit it. Golf carts must comply with safety standards and may only operate on roads where their use has been authorized by the municipality or county.

Can you drive a golf cart on the road in South Dakota?
Yes, in South Dakota, golf carts can be driven on public roads if local ordinances allow it. Operators must have a valid driver’s license, and the golf cart must be insured and display a slow-moving vehicle emblem. Some municipalities may require a permit.

Can you drive a golf cart on local roads?
Yes, you can drive a golf cart on local roads if local regulations permit it. Many communities have designated specific streets for golf cart use, typically those with lower speed limits. Always check local laws to ensure compliance.

Can you drive around in a golf cart?
Yes, you can drive around in a golf cart, but it must be on approved roads or areas where their use is permitted. Ensure that your golf cart meets safety requirements and that you adhere to local regulations regarding operation and insurance.

Search products

Need a Quick Quote on Wholesale Prices? Contact Redway Battery Now.

X
Product has been added to your cart


Shenzhen Redway Power, Inc

Tel: +86 189 7608 1534
Tel: +86 (755) 2801 0506
E-mail: contact@redwaybattery.com
Website: www.redway-tech.com
Youtube: @RedwayPower
TikTok: @redwaybattery

Get a Quick Quote

Hot OEM

Forklift Lithium Battery
Golf Cart Lithium Battery
RV Lithium Battery
Rack-mounted Lithium Battery

Hot Batteries

24V 150Ah Forklift Lithium Battery
24V 200Ah Forklift Lithium Battery
48V 400Ah Forklift Lithium Battery
48V 600Ah Forklift Lithium Battery
80V 400Ah Forklift Lithium Battery
36V 100Ah Golf Cart Lithium Battery
48V 100Ah Golf Cart Lithium Battery
51.2V 50Ah 3U Rack-mounted Lithium Battery
51.2V 100Ah 3U Rack-mounted Lithium Battery
12V 100Ah RV LiFePO4 Lithium Battery (Self-heating)

Hot Blog

Golf Carts
Server Rack Battery
Knowledge