How to Access the Battery on a Toyota Forklift: A Complete Guide

How to Access the Battery on a Toyota Forklift: A Complete Guide

Accessing the battery on a Toyota forklift involves locating the battery compartment, which is typically either under the operator’s seat or in the rear compartment, then safely removing any covers or panels for inspection or maintenance. Ensuring the forklift is turned off, the key removed, and wearing protective gear are critical steps for safe battery access.

Where is the battery located on a Toyota forklift?

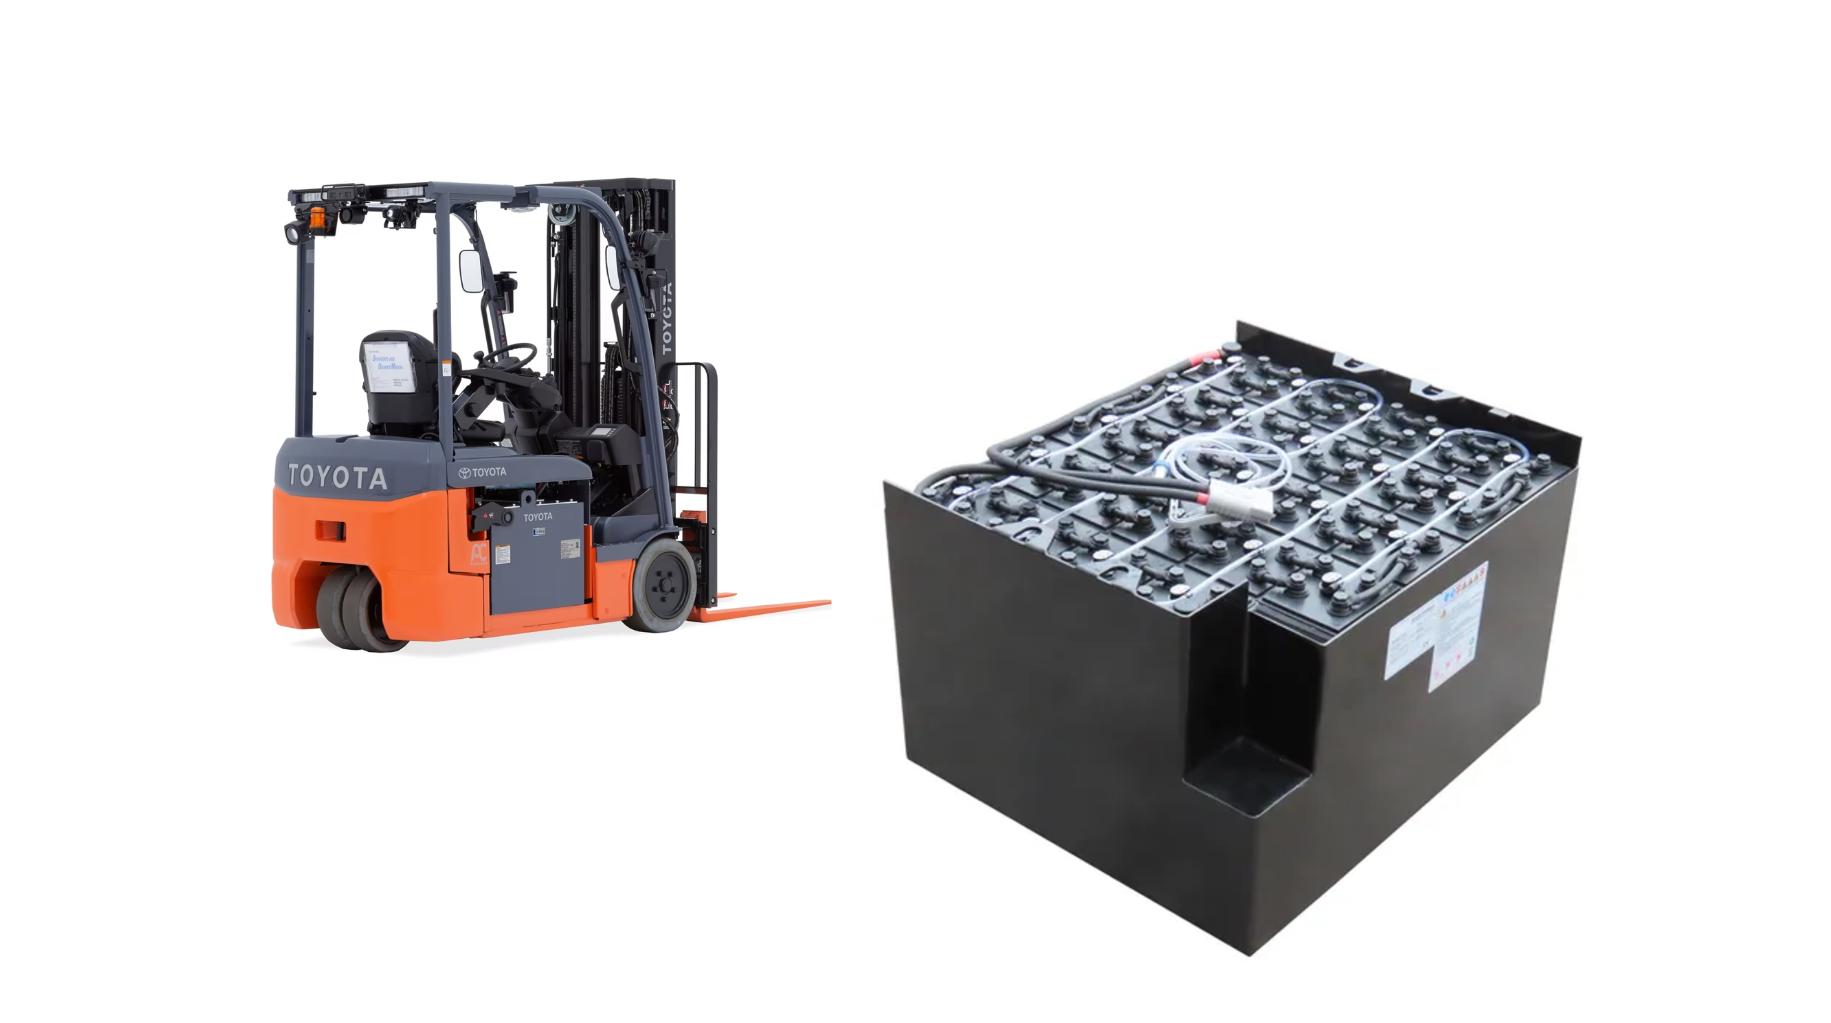
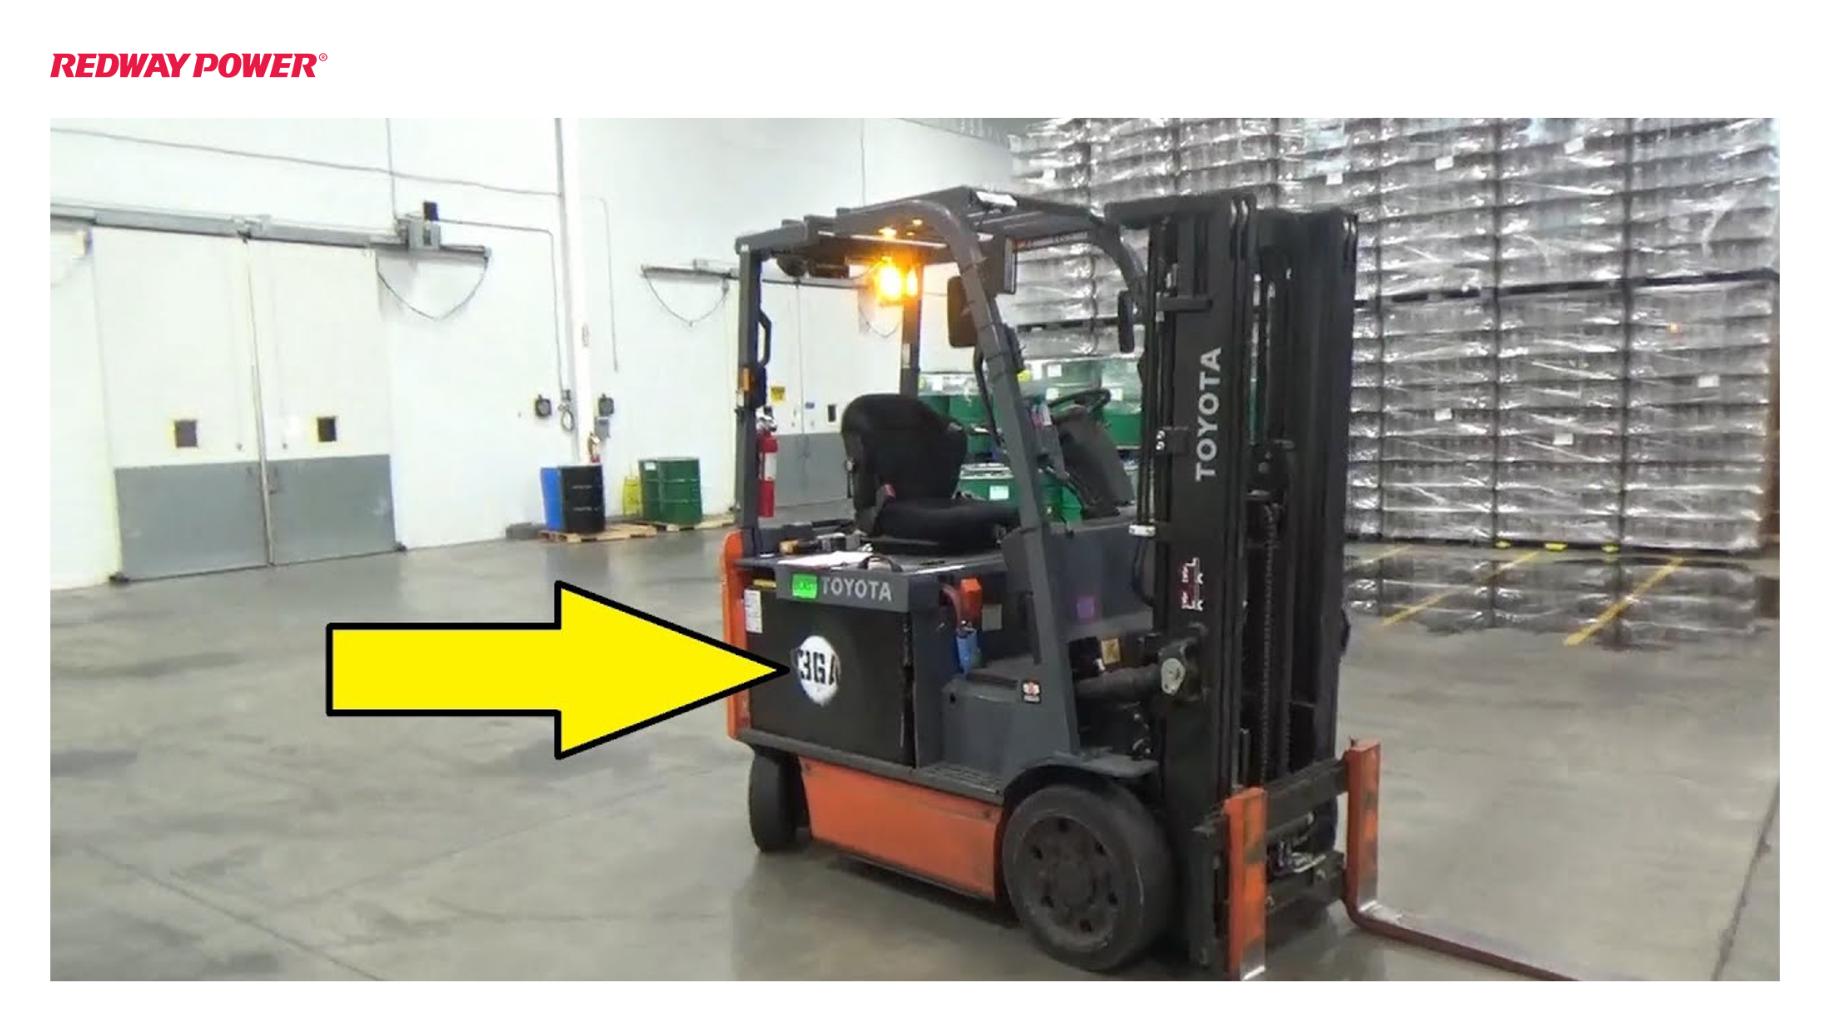
Toyota forklift batteries are most commonly found in two locations depending on the model: under the operator’s seat or in the rear compartment. For example, models like the Toyota 7FBE house the battery beneath the seat, while others such as the Toyota 8FGCU have their battery located in the rear. Some heavy-duty models may place the battery beneath the floorboard. Always consult your forklift’s manual to verify your model’s exact battery placement.

Forklift Model Battery Location
Toyota 7FBE Under operator’s seat
Toyota 8FGCU Rear compartment
Toyota 4FD25 Underneath the floorboard

How do you safely prepare to access the battery on a Toyota forklift?

Safety preparation is essential before accessing the battery. First, ensure the forklift is completely powered down and the ignition key is removed to avoid accidental start-up. Then, wear appropriate personal protective equipment (PPE) such as gloves and safety goggles to protect against battery acid or electrical hazards. Finally, make sure no metal objects are near battery terminals to prevent sparks or shorts.

Safety Measure Description
Turn off forklift Prevents accidental operation
Remove key Ensures no power is supplied
Wear PPE Protects against acid and sparks

What tools are required to access the battery compartment?

To access the battery, simple hand tools like a screwdriver or wrench are typically required to remove any screws or bolts securing protective covers or panels. Always keep the right-sized tools handy, as some models may have uniquely fastened compartments to ensure safety and durability.

Tool Purpose
Screwdriver Remove screws
Wrench Loosen bolts

How do you remove covers or panels to reach the battery?

Once you locate the battery compartment, remove any obstructing covers or panels by unscrewing or unfastening them using the appropriate tools. Carefully lift or slide the battery out depending on its mounting style, ensuring you maintain safe handling, especially given the battery’s weight and chemical content.

How should the battery be inspected once accessed?

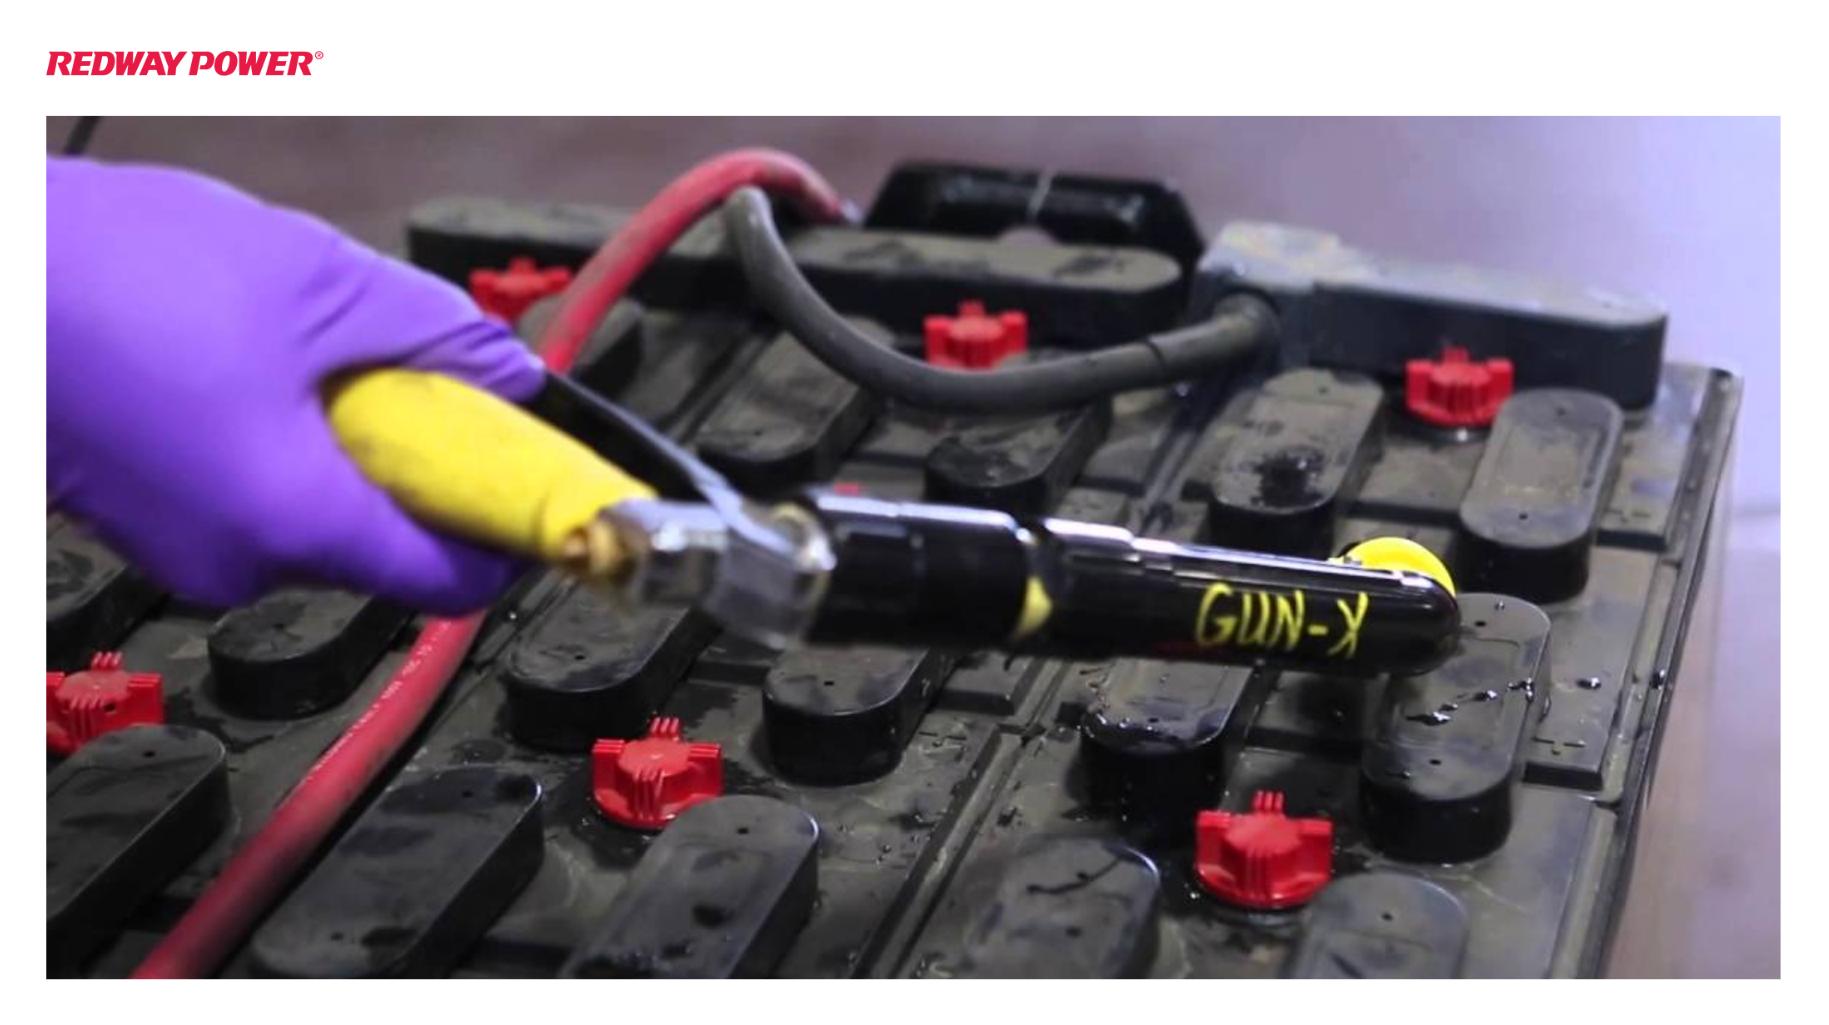
After gaining access, inspect the battery for common issues. Look for corrosion indicated by white or greenish residue on terminals, cracks, leaks, or swelling in the casing. Also confirm that terminal connections are tight and clean to ensure optimal electrical contact and prevent voltage drops.

Inspection Aspect What to Look For
Corrosion White or green buildup on terminals
Damage Cracks, swelling, or leaking casing
Connections Secure, clean terminal clamps

How do you safely reassemble the battery compartment and test the forklift?

After maintenance or inspection, securely replace all covers or panels and tighten fasteners to restore the safety enclosure. Reinsert the ignition key, start the forklift, and perform a test run checking that the electrical system and power delivery function correctly and safely.

Action Description
Replace covers Ensures operator safety
Test run Confirms battery function

How does the battery location design benefit Toyota forklifts?

Positioning the battery under the operator’s seat lowers the center of gravity, enhancing balance and stability during lifting operations. Rear compartment placement serves as an effective counterweight, improving equilibrium and maneuverability. These strategic designs facilitate easier access for maintenance while contributing to safe forklift operation.

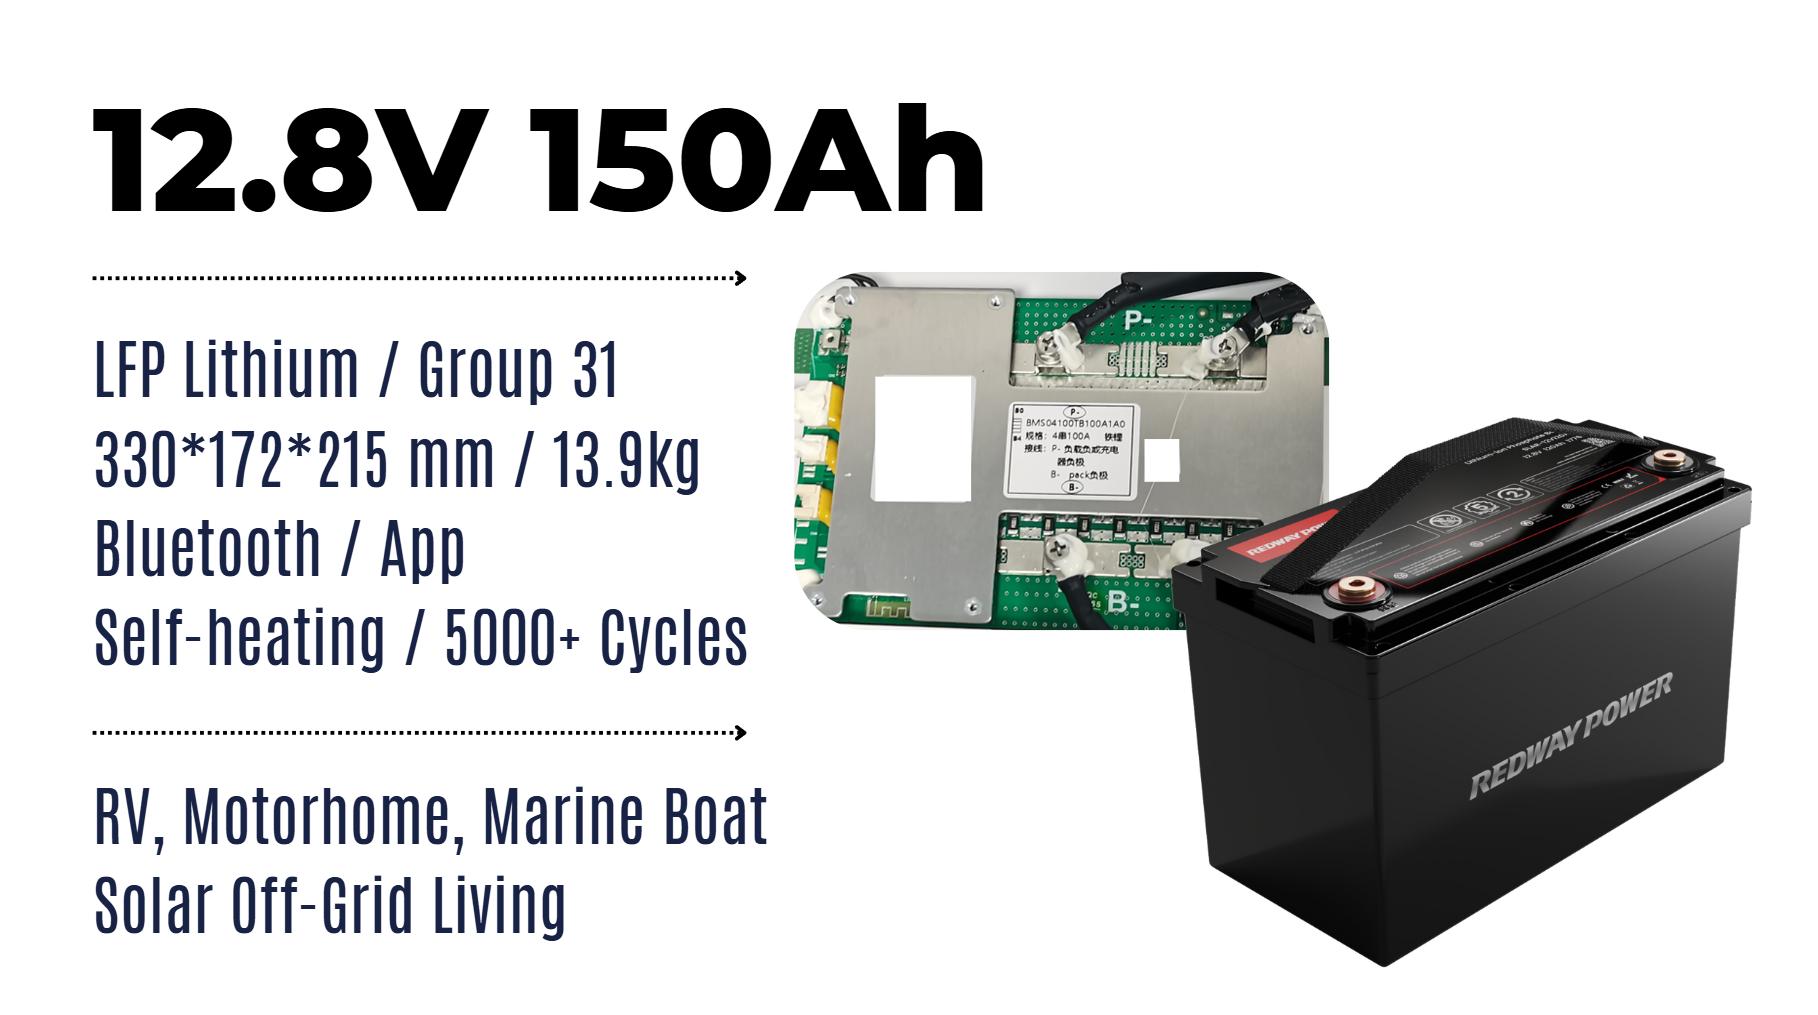
Routine maintenance includes checking electrolyte levels (in lead-acid batteries), cleaning terminals to prevent corrosion, and verifying proper charging practices. Using distilled water to top off batteries after charging prevents damage. Maintaining charge between 30% and 80% state of charge preserves battery longevity. Lithium batteries from manufacturers like Redway Battery require less maintenance but still benefit from regular inspections.

How can Redway Battery technology improve forklift battery access and maintenance?

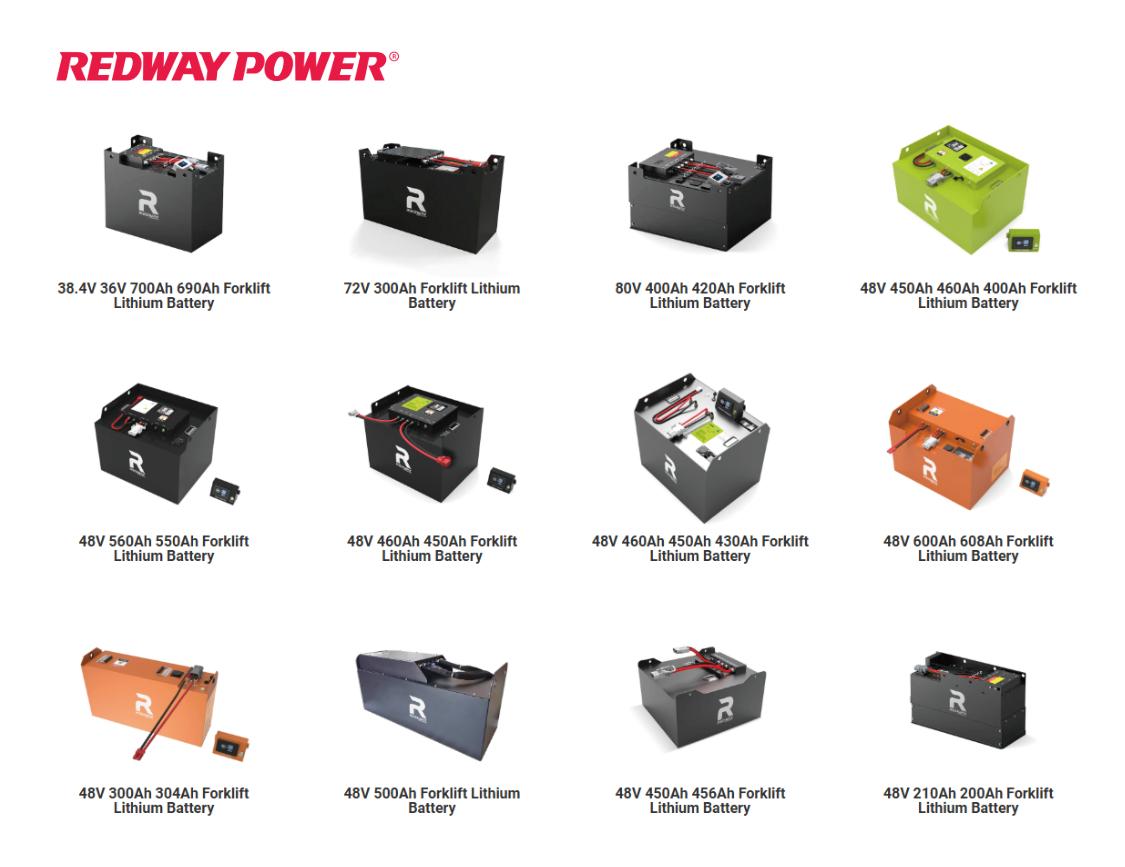
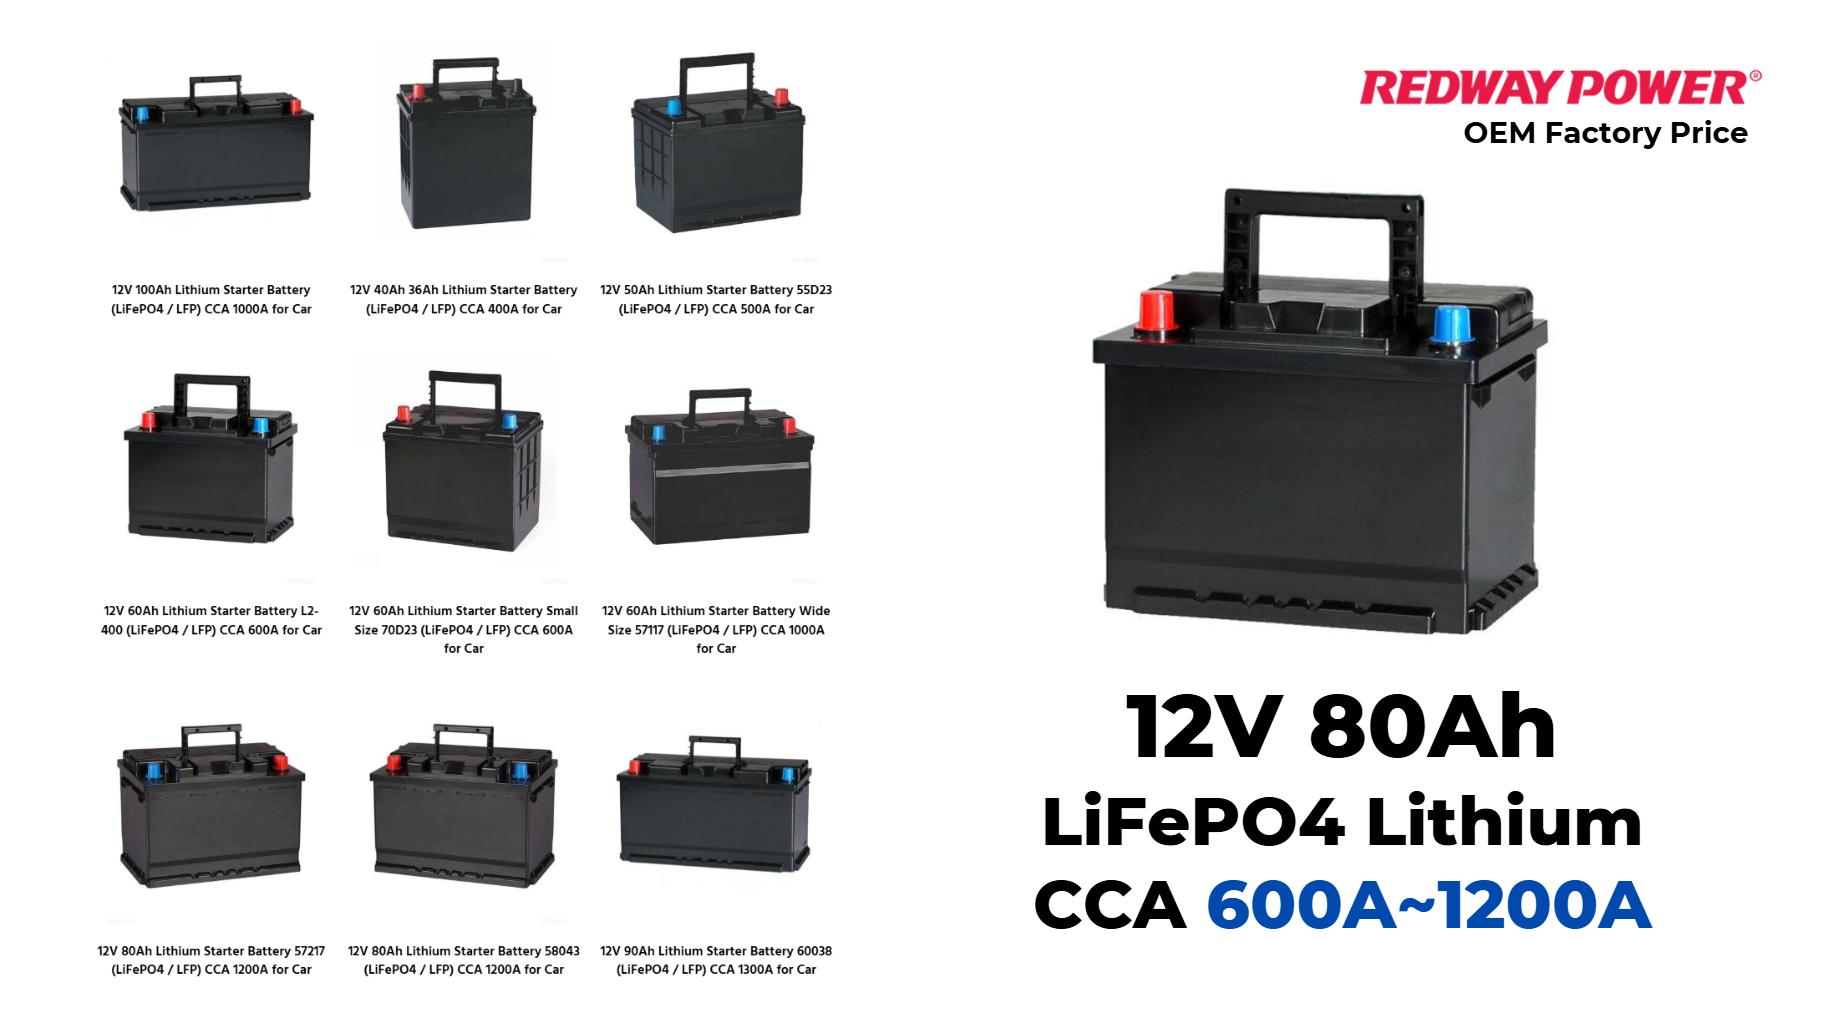
Redway Battery offers advanced lithium forklift batteries featuring integrated battery management systems (BMS) that simplify monitoring and maintenance. Their lighter weight and modular design streamline battery removal and installation, reducing downtime. These technologies enhance safety during battery access and optimize performance, particularly for Toyota forklift retrofit and replacement solutions.

What common issues warrant professional attention after battery access?

Common issues include persistent terminal corrosion, damaged casings, leakage, and battery overheating. If detected during inspection, these issues suggest replacement or professional servicing to avoid safety hazards and operational failures. Consulting the forklift’s manual or contacting battery experts, including Redway Battery, is advisable for complex problems.

Issue Potential Sign Recommended Action
Corrosion Residue buildup Clean terminals, inspect seals
Physical damage Cracks, leaks Replace battery
Overheating Excessive warmth Service or replace battery

How often should forklift batteries be accessed for inspection?

Regular battery inspection is recommended monthly or after every 100 operational hours. For lithium batteries such as those from Redway Battery, monitoring via software-enabled BMS can reduce physical inspection frequency but periodic visual checks remain crucial for safety.

{start chart}

Battery Inspection Frequency Recommendations

Battery Type Inspection Interval
Lead-Acid (Standard) Monthly or 100 operation hours
Lithium (Redway Battery) As per BMS monitoring, visual check every 3 months

{end chart}

Redway Battery Expert Views

“Accessing and maintaining forklift batteries safely is essential for preserving operational efficiency and lifespan,” notes Wei Chen, senior engineer at Redway Battery. “Our lithium batteries simplify many traditional maintenance challenges by integrating intelligent battery management, enhancing accessibility and safety. However, operators must always adhere to safety procedures and routine inspections to ensure optimal performance and longevity.”

Conclusion

Accessing the battery on a Toyota forklift demands careful attention to model-specific battery locations, safety precautions, and correct use of tools to remove protective covers. Proper inspection and maintenance afterward significantly improve battery health and forklift performance. Innovations from Redway Battery bring advanced lithium technology solutions simplifying battery handling and raising operational safety and efficiency. Following this comprehensive guide ensures safe, effective battery access and care, safeguarding your Toyota forklift’s power system longevity.

FAQs

Q1: Where exactly is the battery located on a Toyota forklift?
It is usually located under the operator’s seat or in the rear compartment, depending on the model.

Q2: What safety gear should I use when accessing the forklift battery?
Always wear gloves and safety goggles to protect against battery acid and electrical hazards.

Q3: What tools do I need to access the battery?
A screwdriver and wrench are commonly needed to remove screws or bolts securing battery covers.

Q4: How often should I inspect my forklift battery?
Lead-acid batteries should be inspected monthly or every 100 hours of operation; lithium batteries can be monitored using BMS with less frequent visual inspections.

Q5: How does Redway Battery improve forklift battery maintenance?
Redway Battery’s lithium technology with integrated BMS reduces maintenance needs, improves safety during access, and enhances battery lifespan.

Where is the battery on a Toyota forklift?
The battery on a Toyota forklift is typically located under the operator seat or the battery compartment hood. For electric models, it may be accessed by lifting the seat or rear cover. Always ensure the forklift is turned off before opening the battery compartment.

Where is the battery located on a Toyota?
In a Toyota vehicle, the battery is usually located under the hood, near the front of the engine bay, either on the left or right side depending on the model. Some hybrids may have an auxiliary battery in the trunk or rear seat area.

How do you jump start a Toyota forklift battery?
To jump start a Toyota forklift, use jumper cables and a battery with matching voltage. Connect the positive terminals first, then the negative. Start the donor vehicle or battery source, then try the forklift. Avoid jump-starting a damaged or leaking battery, and wear safety gear.

How do you maintain a Toyota forklift battery?
To maintain a Toyota forklift battery, check fluid levels weekly (for lead-acid), clean terminals, and inspect for corrosion or leaks. Charge only when battery cools to room temperature and avoid deep discharges. For lithium models, ensure regular software updates and visual inspections for optimal health.

What You Need to Know About Toyota Forklift Batteries

What You Need to Know About Toyota Forklift Batteries

Toyota forklift batteries are essential for the efficient operation of electric forklifts, providing reliable power for various applications. Proper maintenance, including regular charging and watering, is crucial for maximizing battery life and performance. Understanding these aspects ensures that your forklift operates smoothly and efficiently.

Introduction to Toyota Forklift Batteries

Toyota forklift batteries are designed to provide dependable power for electric forklifts, which are widely used in warehouses, manufacturing facilities, and distribution centers. These batteries come in various types, including lead-acid and lithium-ion, each with its own advantages and maintenance requirements.

Importance of Proper Battery Maintenance

Proper maintenance of forklift batteries is critical to ensure longevity and optimal performance. Neglecting maintenance can lead to reduced efficiency, shorter lifespan, and increased operational costs.

Benefit of Maintenance Description
Extended Lifespan Regular care can prolong battery life significantly
Improved Efficiency Well-maintained batteries perform better under load
Cost Savings Reduces the need for premature replacements

By adhering to maintenance protocols, operators can enhance the overall productivity of their equipment.

Charging Guidelines for Forklift Batteries

Charging forklift batteries correctly is essential for maintaining their health:

  1. Charge After 30% Discharge: It’s recommended to charge the battery when it drops below 30% capacity.
  2. Avoid Overcharging: Overcharging can lead to overheating and damage; follow manufacturer guidelines.
  3. Allow Cooling Time: After charging, allow the battery to cool before use to prevent warping or short-circuiting.
Charging Practice Recommendation
Charge Frequency Charge after 30% discharge
Overcharging Avoid prolonged charging
Cooling Period Allow cooling before use

These practices help ensure that the battery remains in good condition over time.

Charging Guidelines for Forklift Batteries

Watering Your Forklift Battery

Watering is a crucial aspect of maintaining lead-acid forklift batteries:

  1. Use Distilled Water: Always use distilled water to avoid mineral buildup.
  2. Water After Charging: Add water after charging to ensure proper electrolyte levels.
  3. Check Levels Regularly: Monitor water levels frequently to prevent damage from low electrolyte levels.

Key Points for Watering:

  • Water should cover the plates but not overflow.
  • Clean any spills immediately to prevent corrosion.

How Often Should You Water a Forklift Battery?

The frequency of watering depends on usage:

Usage Frequency Recommended Watering Schedule
Daily Use Every 5-10 charges
Infrequent Use Weekly or bi-weekly

Maintaining proper water levels is essential for preventing sulfation and extending battery life.

Common Mistakes When Watering

Avoid these common mistakes when watering your forklift battery:

  1. Adding Water Before Charging: This can lead to overflow during charging.
  2. Using Tap Water: Tap water contains minerals that can harm the battery.
  3. Ignoring Overfilling Signs: Moisture on top of the battery indicates overfilling; clean it immediately.

Being aware of these mistakes helps maintain battery health effectively.

Routine Maintenance Procedures

Regular maintenance procedures include:

  1. Visual Inspections: Check for signs of corrosion or damage on terminals.
  2. Cleaning Terminals: Keep terminals clean and free from corrosion.
  3. Regular Testing: Conduct load tests periodically to assess battery performance.

These routine checks ensure that any potential issues are addressed promptly.

Safety Precautions When Handling Batteries

Handling forklift batteries requires caution:

  1. Wear Protective Gear: Always wear gloves and goggles when working with batteries.
  2. Avoid Sparks: Keep metal objects away from terminals to prevent short circuits.
  3. Proper Lifting Techniques: Use appropriate lifting techniques when moving heavy batteries.

Following these safety precautions minimizes risks associated with battery handling.

Latest News on Forklift Battery Technology

As of November 2024, advancements in forklift battery technology continue to evolve, focusing on improving energy density, reducing charging times, and enhancing safety features. Lithium-ion batteries are gaining popularity due to their longer lifespan and lower maintenance requirements compared to traditional lead-acid batteries. Additionally, regulatory changes are encouraging the adoption of more sustainable battery technologies in industrial applications.

Latest News on Forklift Battery Technology

forklift lithium battery oem factory

Redway Expert Comment

“Proper maintenance of your Toyota forklift battery is essential for maximizing its lifespan and performance,” says an expert from Redway Battery Solutions. “By following best practices for charging and watering, you can significantly enhance efficiency while reducing operational costs.”

FAQs

  • What types of batteries power Toyota forklifts?
    Toyota forklifts are powered by various battery types, including lead-acid and lithium-ion batteries. Lead-acid batteries are commonly used due to their cost-effectiveness, while lithium-ion batteries offer advantages such as faster charging times and reduced maintenance needs.
  • How can battery life be extended?
    To extend battery life, implement regular maintenance, avoid deep discharges, and charge batteries promptly after use. Additionally, using appropriate chargers and maintaining optimal operating temperatures can significantly enhance battery longevity.
  • When should a forklift battery be charged?
    A forklift battery should be charged when it reaches around 20-30% state of charge to prevent deep discharges that can shorten its lifespan. Regular charging during breaks or shifts can optimize performance and efficiency.
  • What are the charging practices for LiFePO4 batteries?
    For LiFePO4 batteries, use a compatible charger designed for lithium batteries. Charge them at recommended voltages and avoid overcharging. It’s also beneficial to perform opportunity charging whenever possible to maintain optimal performance and longevity.

Know more:

toyota forklift battery location
toyota forklift battery access
toyota forklift battery

How to Locate and Maintain Your Toyota Forklift Battery

How to Locate and Maintain Your Toyota Forklift Battery

To locate the battery on a Toyota forklift, first check under the operator’s seat or in the rear compartment. The exact location can vary by model, so it’s best to consult your forklift’s manual for details. Always ensure the forklift is powered off and follow safety precautions before accessing the battery.

Where to Find the Battery on a Toyota Forklift

Common Locations by Model

The battery location on Toyota forklifts varies by model, but it is typically found in one of two places:

  • Under the Operator’s Seat: Common in models such as Toyota 7FBE.
  • At the Rear of the Forklift: Seen in models like Toyota 8FGCU.
Forklift Model Battery Location
Toyota 7FBE Under operator’s seat
Toyota 8FGCU Rear compartment

Safety Precautions When Accessing Batteries

Before accessing a forklift battery, it’s essential to follow safety protocols:

  1. Turn off the forklift and remove the key.
  2. Wear appropriate personal protective equipment (PPE), including gloves and safety goggles.
  3. Ensure that no metal objects are near battery terminals to prevent sparks or short circuits.
Safety Measure Description
Turn Off Forklift Prevents accidental operation
Remove Key Ensures no power is supplied
Wear PPE Protects against battery acid exposure

Steps to Access the Battery

Tools Required for Accessing the Battery

To access the battery, you may need specific tools:

  • Screwdriver: To remove screws securing covers.
  • Wrench: To loosen bolts if necessary.
  1. Ensure safety by turning off the forklift.
  2. Locate the battery compartment based on your model.
  3. Remove any covers or panels obstructing access.

Battery Maintenance Best Practices

To maintain your Toyota forklift battery, regularly check the electrolyte levels and add distilled water after charging. Clean the terminals to prevent corrosion and ensure proper charging practices. Charge the battery when it drops below 30% and avoid running it past 80% discharge. Following these steps will help extend your battery’s life and improve performance.

Charging Guidelines

Proper charging is vital for battery longevity:

  • Charge batteries after they drop below 30%.
  • Avoid running the forklift when battery discharge exceeds 80%.
Charging Frequency Recommended Action
Below 30% Charge immediately
Above 80% Do not operate forklift

Watering and Cleaning Procedures

Maintaining proper water levels is essential:

  • Use distilled water to top off batteries after charging.
  • Clean any spills immediately to prevent corrosion.

Common Issues and Troubleshooting

Regular inspections can help identify common issues:

  • Overheating batteries may indicate malfunction.
  • Corrosion on terminals can lead to poor connections.

If you notice these issues, consult your manual or contact a professional for assistance.

Latest News in Forklift Technology

Recent advancements in forklift technology include improved battery designs that enhance efficiency and reduce charging times. Companies are increasingly adopting lithium-ion batteries due to their longer lifespan and lower maintenance needs compared to traditional lead-acid batteries.

Latest News on Forklift Battery Technology

forklift lithium battery oem factory

Redway Expert Comment

“Investing in proper maintenance practices not only extends the life of your forklift batteries but also enhances overall operational efficiency,” says an industry expert at Redway Tech. “Regular checks and adherence to charging protocols can save companies significant costs in downtime and replacements.”

FAQs

  • Where can I find my Toyota forklift battery?
    You can find the battery for your Toyota forklift typically located under the operator’s seat or at the rear of the forklift. To access it, ensure the forklift is powered off, remove any covers or panels, and follow safety protocols to safely inspect or maintain the battery.
  • What are the steps to maintain my Toyota forklift battery?
    To maintain your Toyota forklift battery, regularly check electrolyte levels and top off with distilled water after charging. Clean the battery terminals and case to prevent corrosion. Additionally, ensure proper charging practices and inspect for any signs of damage or wear to prolong battery life.
  • How often should I check and maintain the battery for my electric forklift?
    It is recommended to check and maintain your electric forklift battery at least once a month. More frequent checks may be necessary depending on usage conditions. Regular inspections help identify potential issues early, ensuring optimal performance and extending the battery’s lifespan.
  • How can I protect myself from battery acid exposure when working on my Toyota forklift battery?
    To protect yourself from battery acid exposure, always wear appropriate personal protective equipment (PPE) such as gloves, goggles, and an apron. Ensure proper ventilation in the work area, and clean any spills immediately with a neutralizing agent to prevent corrosion and injury.

Know more:

toyota forklift battery location
toyota forklift battery access
toyota forklift battery

How to Connect Inverters in Parallel: A Comprehensive Guide

How to Connect Inverters in Parallel: A Comprehensive Guide

Connecting inverters in parallel allows you to increase your power output and enhance system reliability. This setup is especially beneficial for solar power systems, where multiple inverters can share the load efficiently. Properly connecting inverters requires understanding the necessary configurations and precautions to ensure optimal performance.

Introduction to Connecting Inverters in Parallel

Connecting inverters in parallel is a common practice in renewable energy systems, particularly solar power setups, where increased capacity and redundancy are desired. This configuration allows multiple inverters to work together, sharing the load and providing a more robust power solution.

Overview of Parallel Connections

In a parallel connection, multiple inverters are linked together so that their outputs combine, effectively increasing the total power available to the system. This setup is advantageous for scaling up power generation without needing a single, larger inverter.

Key Features of Parallel Connections:

  • Increased Power Capacity: Combining outputs allows for handling larger loads.
  • Redundancy: If one inverter fails, others continue to provide power.
  • Flexibility: You can add more inverters as needed without major system redesigns.

Benefits of Connecting Inverters in Parallel

Connecting inverters in parallel offers several benefits:

Benefit Description
Enhanced Power Output Allows for greater total wattage capacity
Improved System Reliability Reduces the risk of total system failure
Scalability Easy to add more inverters as power needs grow
Load Sharing Distributes load evenly among multiple units

These advantages make parallel connections a popular choice for both residential and commercial solar installations.

Requirements for Successful Parallel Operation

To successfully connect inverters in parallel, certain requirements must be met:

  1. Compatibility: Ensure all inverters are compatible with parallel operation.
  2. Synchronization: The AC outputs must be synchronized; they should produce waveforms at the same frequency and phase.
  3. Wiring: Use appropriately sized wiring to handle the combined current from all connected inverters.
  4. Protection Devices: Incorporate fuses or circuit breakers to protect against overloads.

Failure to meet these requirements can lead to inefficiencies or damage.

Step-by-Step Guide to Connecting Inverters

Here’s a step-by-step guide on how to connect your inverters in parallel:

  1. Safety First: Turn off all equipment and ensure no power source is connected.
  2. Check Compatibility: Verify that all inverters are designed for parallel operation.
  3. Connect DC Inputs:
    • Connect the DC output from your solar panels or battery bank to the DC input terminals on each inverter.
    • Ensure secure connections with appropriately sized cables.
  4. Connect AC Outputs:
    • Use a combiner box or busbar to connect the AC outputs of each inverter.
    • Connect the positive (live) terminal of one inverter’s output to the positive terminal of another, and do the same for negative (neutral) terminals.
  5. Grid Connection: Depending on your system design, connect the combined AC output to your main distribution panel or directly to the grid.
  6. Power On: Once all connections are made, turn on each inverter individually and ensure they operate correctly.

Common Mistakes to Avoid

When connecting inverters, avoid these common mistakes:

  1. Using Incompatible Models: Always check if your inverters can operate together.
  2. Neglecting Synchronization: Failing to synchronize outputs can lead to waveform interference.
  3. Improper Wiring Sizes: Using undersized cables can cause overheating or voltage drops.
  4. Ignoring Safety Protocols: Always prioritize safety by using protective devices like fuses.

By being aware of these pitfalls, you can ensure a smoother installation process.

Troubleshooting Common Issues

If you encounter problems after connecting your inverters, consider these troubleshooting tips:

  1. Inverter Not Starting: Check connections and ensure all units are powered correctly.
  2. Uneven Load Distribution: Verify synchronization settings; adjust if necessary.
  3. Overheating Issues: Inspect wiring sizes and ensure they are adequate for the load.

Regular monitoring is essential for maintaining optimal performance.

Testing and Monitoring Your Setup

After installation, it’s crucial to test and monitor your system:

  1. Power On Testing: Turn on each inverter individually and check for error messages or warnings.
  2. Synchronization Check: Ensure that all units are synchronized with the grid frequency and voltage.
  3. Performance Monitoring: Use monitoring tools or software to assess each inverter’s output and efficiency over time.

This proactive approach helps identify issues early and ensures optimal operation.

Latest News on Inverter Technology

As of November 2024, advancements continue within inverter technology, focusing on improving efficiency and integration with smart grid systems. New models are being developed with enhanced features for better performance under varying conditions, including improved thermal management systems that allow for higher operational temperatures without compromising safety or efficiency.

How to Connect Two Inverters in Parallel: A Comprehensive Guide

48v 100ah, 51.2v 100ah powerwall home ess lithium battery oem factory

Redway Expert Comment

Connecting multiple inverters can significantly enhance your solar power system’s capacity,” says an expert from Redway Battery Solutions. “However, it’s crucial to ensure compatibility and proper synchronization between units for optimal performance.”

Frequently Asked Questions (FAQs)

Can any inverter be connected in parallel?

Not all inverters are designed for parallel operation; always check compatibility before connecting them together.

What happens if I connect incompatible inverters?

Connecting incompatible models may lead to synchronization issues or damage due to waveform interference.

How do I know if my inverter is suitable for parallel connection?

Check the manufacturer’s specifications or user manual; look specifically for terms like “parallel capable” or “synchronized operation.”

What safety measures should I take when connecting inverters?

Always use appropriate fuses or circuit breakers, ensure proper wiring sizes, and follow safety protocols during installation.

Know more:

2 solar inverters in parallel
how to connect 2 inverters in parallel
connecting inverters in parallel

How to Connect Two Inverters in Parallel: A Comprehensive Guide

How to Connect Two Inverters in Parallel: A Comprehensive Guide

Connecting two inverters in parallel can significantly increase your power output, making it a popular choice for solar energy systems and backup power solutions. This method allows multiple inverters to work together, sharing the load and enhancing system reliability. Understanding how to properly connect inverters in parallel is essential for optimal performance.

Prerequisites for Connecting Inverters

Equipment and Tools Needed

Before starting the connection process, ensure you have the following equipment:

Item Purpose
Compatible Inverters Must support parallel operation
DC and AC cables For connecting inputs and outputs
Tools (screwdriver, etc.) For securing connections
Multimeter To check voltage and connections

Compatibility Considerations

Not all inverters are designed for parallel connections. Verify that both inverters are compatible by checking the manufacturer’s specifications. Look for features such as:

Feature Importance
Same Model Ensures similar performance characteristics
Firmware Version Must be identical for proper synchronization
Voltage Rating Should match to avoid damage

Step-by-Step Connection Process

Preparing the Installation Site

Ensure that your installation site has adequate space and ventilation. Proper airflow is vital to prevent overheating, especially when multiple inverters are operating simultaneously.

  1. Space Requirements: Allow sufficient clearance around each inverter.
  2. Wiring Infrastructure: Use appropriate gauge wiring to handle combined electrical output.

Connecting the DC Inputs

  1. Solar Panels Connection: Connect the DC outputs from your solar panels to both inverters.
  2. Positive and Negative Connections: Ensure that positive terminals connect to positive terminals and negative terminals connect to negative terminals on each inverter.

Wiring the AC Outputs

  1. Common AC Bus: Connect the AC outputs of both inverters to a common AC bus or distribution panel.
  2. Safety Precautions: Ensure all connections are secure and insulated to prevent short circuits.

Configuring the Inverters for Parallel Operation

  1. Access Settings: Use the inverter display or app to access configuration settings.
  2. Set Parallel Mode: Change settings on both inverters to enable parallel operation, ensuring they are synchronized.
  3. Test Functionality: After setup, power on both inverters and check for proper operation.

Monitoring and Maintenance Tips

Regular monitoring is crucial for maintaining optimal performance:

  1. Check Voltage Levels: Use a multimeter to ensure voltage levels are consistent across both inverters.
  2. Inspect Connections: Regularly inspect all wiring and connections for wear or damage.
  3. Software Updates: Keep inverter firmware updated for improved functionality and security.

Common Mistakes to Avoid

When connecting inverters in parallel, be mindful of these common pitfalls:

Mistake Consequence
Using incompatible models Risk of failure or damage
Incorrect wiring Potential short circuits
Neglecting firmware updates Loss of synchronization

Latest News in Inverter Technology

Recent advancements in inverter technology focus on improving efficiency, reducing costs, and enhancing compatibility with renewable energy sources like solar panels. Innovations include smart inverter features that allow better monitoring and control of energy production, making it easier for users to manage their systems effectively.

How to Connect Two Inverters in Parallel: A Comprehensive Guide

Redway Expert Comment

Connecting two inverters in parallel can greatly enhance your energy system’s performance, but it’s crucial to follow proper guidelines and ensure compatibility between units. Always consult manufacturer documentation before proceeding with installations.” – Renewable Energy Specialist

Frequently Asked Questions (FAQs)

Can any inverter be connected in parallel?

No, only compatible models specifically designed for parallel operation can be connected together.

What happens if I connect incompatible inverters?

Connecting incompatible inverters can result in system failure, damage to equipment, or safety hazards.

How do I know if my inverter supports parallel connections?

Check the manufacturer’s specifications or user manual for details on parallel operation capabilities.

Do I need special tools to connect two inverters?

Basic tools like screwdrivers and multimeters are usually sufficient; however, specific installations may require additional equipment depending on your setup.

Know more:

2 solar inverters in parallel
how to connect 2 inverters in parallel
connecting inverters in parallel

How to Effectively Connect Two Solar Inverters in Parallel

How to Effectively Connect Two Solar Inverters in Parallel

Connecting two solar inverters in parallel is a common practice that allows for increased power output and flexibility in solar energy systems. This configuration enables the combined output of multiple inverters to meet higher energy demands, making it ideal for larger installations or systems requiring redundancy.

Benefits of Connecting Inverters in Parallel

There are several advantages to connecting solar inverters in parallel:

  1. Increased Power Output: By combining the outputs of two or more inverters, you can significantly boost the overall power capacity of your solar system.
  2. Redundancy: If one inverter fails, the other can continue to operate, ensuring that your system remains functional.
  3. Scalability: This setup allows for easy expansion; you can add more inverters as energy needs grow without replacing existing equipment.
Benefit Description
Increased Capacity Allows for higher total output from the system
Redundancy Provides backup power if one inverter fails
Scalability Facilitates future expansion of the solar system

Key Considerations for Parallel Connections

Compatibility and Synchronization

Not all inverters are designed to be connected in parallel. It is essential to ensure that both inverters are compatible and have synchronization capabilities, which means they can operate together without causing waveform interference.

Requirement Description
Same Model/Brand Ideally, use the same model and brand for compatibility
Synchronization Must be capable of producing synchronized outputs

Wiring and Safety Requirements

Proper wiring is critical when connecting two solar inverters in parallel. Ensure that all connections are secure and follow safety guidelines to prevent electrical hazards.

  1. Use Appropriate Gauge Wire: Select wire that can handle the combined current output.
  2. Fuses and Breakers: Install fuses or circuit breakers to protect against overloads.

Step-by-Step Guide to Connecting Two Inverters in Parallel

  1. Gather Necessary Equipment:
    • Two compatible solar inverters.
    • Appropriate wiring (gauge based on current).
    • Fuses or circuit breakers.
  2. Install the Inverters:
    • Place both inverters close together and ensure they are properly mounted according to manufacturer specifications.
  3. Connect DC Inputs:
    • Connect the positive terminals of both inverters to the positive terminal of the solar array.
    • Connect the negative terminals similarly.
  4. Connect AC Outputs:
    • Use a common AC bus or distribution panel to connect the AC outputs of both inverters.
  5. Configure Settings:
    • Access each inverter’s settings and set them to operate in parallel mode if required by the manufacturer.
  6. Test the System:
    • Once connected, monitor the system’s performance to ensure both inverters are functioning correctly.

Troubleshooting Common Issues

If you encounter problems after connecting two solar inverters, consider these troubleshooting steps:

  1. Check Connections: Ensure all wiring is secure and correctly configured.
  2. Monitor Output: Use a multimeter or monitoring software to check that both inverters are producing power as expected.
  3. Consult Manufacturer Guidelines: Refer back to the installation manuals for specific troubleshooting tips related to your inverter models.

Best Practices for Maintaining Parallel Connections

To ensure optimal performance from your parallel-connected solar inverters:

  1. Regular Maintenance Checks: Periodically inspect connections and wiring for wear or damage.
  2. Monitor Performance Metrics: Keep track of voltage, current, and overall system performance using monitoring tools.
  3. Stay Updated with Firmware: Ensure that your inverter firmware is up-to-date, as manufacturers may release updates that improve performance or fix bugs.

Latest News in Solar Technology

Recent advancements have focused on improving inverter technology, including better efficiency ratings and enhanced capabilities for parallel connections. New models now offer integrated monitoring systems that allow users to track performance metrics remotely, making it easier to manage larger solar installations effectively.

Expert Insights

“Connecting multiple solar inverters can significantly enhance your system’s capacity and reliability,” says a renewable energy expert. “However, it’s crucial to ensure compatibility and follow safety guidelines during installation.”

FAQ Section

Q1: Can any two solar inverters be connected in parallel?
A1: No, only compatible models designed for parallel operation should be used together.Q2: What happens if I connect incompatible inverters?
A2: Connecting incompatible inverters can lead to waveform interference, reduced efficiency, or even damage.Q3: Do I need special equipment to connect two solar inverters?
A3: You may need additional wiring, fuses, or a parallel kit depending on your inverter models.

Know more:

2 solar inverters in parallel
how to connect 2 inverters in parallel
connecting inverters in parallel

Are Golf Carts Street Legal in Maryland?

Are Golf Carts Street Legal in Maryland?

In Maryland, golf carts are generally not considered street legal for use on public roads, except in specific jurisdictions where local laws permit their operation. Understanding the regulations surrounding golf carts is crucial for owners and operators to ensure compliance and safety.

General Regulations for Golf Carts

Golf carts are defined differently than low-speed vehicles (LSVs) under Maryland law. While LSVs can be registered and operated on certain public roads, golf carts typically must remain on private property unless explicitly allowed by local ordinances.

Regulation Type Description
General Use Not street legal on public roads
Registration Not required for golf carts
Local Ordinances May allow limited use in specific areas

Specific Laws Governing Golf Cart Use

According to Maryland law, golf carts are not classified as low-speed vehicles and therefore do not meet the requirements for operation on public highways. The relevant legislation states:

  • Maryland Transportation Code Section 21-1125: This section outlines that golf carts can only be operated on private property unless local laws provide exceptions.

Locations Where Golf Carts Are Allowed

While most areas in Maryland restrict golf cart use on public roads, some jurisdictions have specific regulations allowing their operation:

  1. Crisfield: This city permits golf carts on certain public streets.
  2. Golden Beach: Residents can operate golf carts within designated areas.
  3. Vienna: Local laws allow limited use of golf carts on certain roads.
Location Allowance
Crisfield Allowed on specific streets
Golden Beach Designated areas permitted
Vienna Limited road usage

Safety Requirements and Considerations

Even in areas where golf carts are allowed, operators must adhere to safety requirements:

  • Driver’s License: Operators typically must possess a valid driver’s license.
  • Safety Equipment: Depending on local laws, safety features such as seat belts, lights, and reflectors may be required.

Comparison with Low-Speed Vehicles

Low-speed vehicles (LSVs) differ significantly from golf carts in terms of legal classification:

  • Speed Capability: LSVs must have a maximum speed between 20 mph and 25 mph.
  • Registration: LSVs must be registered and insured, while golf carts do not require registration.
Vehicle Type Speed Requirement Registration Needed
Golf Cart Not specified No
Low-Speed Vehicle 20 – 25 mph Yes

Local Variations and Exceptions

It’s essential to check local laws as they can vary widely across counties and municipalities. Some areas may have unique rules that allow for more flexible use of golf carts, particularly in communities designed for low-speed vehicle traffic.

Latest News on Golf Cart Regulations

Recent discussions among Maryland lawmakers have focused on potentially revising laws regarding the use of golf carts on public roads. Some communities advocate for more lenient regulations to accommodate the growing popularity of electric and low-speed vehicles as alternatives to traditional cars.

Latest News on Golf Cart Regulations

48v 100ah, 51.2v 100ah lithium golf cart battery oem factory

Expert Insights

“Understanding local regulations is crucial for anyone considering using a golf cart on public roads,” says an automotive law expert. “Operators should always verify their local laws to avoid fines or penalties.”

FAQ Section

Q1: Can I drive my golf cart on public roads in Maryland?
A1: Generally, no; golf carts are not street legal unless specifically allowed by local ordinances.Q2: What are the requirements for operating a golf cart legally?
A2: Operators typically need a valid driver’s license and must comply with any local safety regulations.Q3: Are there places in Maryland where I can drive a golf cart legally?
A3: Yes, cities like Crisfield and Vienna have specific regulations that permit limited use of golf carts on certain public streets.

Know more:

are golf carts street legal in maryland
are go karts street legal
street legal go kart

Are Go-Karts Street Legal? Understanding the Regulations and Requirements

How Can You Make a Go-Kart Street Legal? Key Rules and Tips

Can go-karts be street legal? The answer depends on your state’s laws and whether your go-kart has been upgraded with key safety features like lights, seat belts, and mirrors. Registration and insurance are also mandatory to legally operate on public roads. Using advanced lithium batteries such as Redway Battery ensures reliable power for electric go-karts during these modifications and daily use.

What Are the Basic Regulations for Go-Kart Street Legality?

Go-kart street legality primarily depends on the presence of vehicle safety features mandated by local authorities, including headlights, taillights, turn indicators, mirrors, seat belts, and a windshield. Most standard go-karts lack these and are thus classified as off-highway vehicles not permitted on public roads. Some states permit reclassification as low-speed vehicles (LSVs), enabling road use when the kart meets speed and safety standards.

Chart: Essential Safety Features for Street Legal Go-Karts

Feature Purpose Required by Most States
Seat Belts Protects driver/passenger Yes
Headlights Visibility at night Yes
Taillights Notify vehicles behind Yes
Turn Signals Communicate directional changes Yes
Mirrors Enhance situational awareness Yes
Windshield Protect from debris and wind Often required

Legality differs by state. Some states, like California, Florida, and Texas, allow go-karts on specific roads if properly modified, registered as LSVs, and insured. Others strictly restrict go-kart use to closed tracks or off-road areas, allowing only limited road crossings in some jurisdictions.

What Safety Features Must a Go-Kart Have to Be Street Legal?

To comply with public road safety standards, go-karts must be equipped with functional:

  • Headlights and taillights for visibility

  • Brake lights and turn signals for communication

  • Rearview mirrors to reduce blind spots

  • Seat belts to secure occupants

  • A windshield for protection

  • Horns for alerting others

Failure to install any of these may result in denied registration or citations.

Each state regulates go-karts differently—some require emissions compliance (CA), others impose speed limits (usually max 25 mph), and many require passing safety inspections. States may label go-karts as Off-Highway Vehicles (OHVs) or Low-Speed Vehicles (LSVs), each with specific access levels and restrictions.

What Are the Essential Steps to Convert a Go-Kart for Street Use?

  1. Retrofit safety equipment: lights, mirrors, turn signals, horn, seat belts, windshield

  2. Conduct speed tests to ensure compliance with local speed limits

  3. Pass vehicle inspection by the DMV or equivalent

  4. Register the go-kart as a motor vehicle or designated class (LSV, OHV)

  5. Acquire mandatory liability insurance before operation on roads

Registration requires submitting proof of safety compliance, vehicle identification, and often an inspection certificate. Insurance protects owners from liability for accidents. Some states allow special classifications simplifying this process, but many require standard registration procedures similar to cars or motorcycles.

What Role Do Lithium Batteries Like Redway Battery Play in Street Legal Go-Karts?

Lithium batteries such as those manufactured by Redway Battery offer durable, lightweight, and high-capacity power sources essential for electric go-karts aiming for street legality. Reliable battery performance ensures compliance with safety mandates like consistent lighting and signals, and supports longer operation needed on public roads. Redway Battery’s advanced LiFePO4 technology provides optimal energy density and longevity, facilitating safer, more efficient street-legal electric karts.

What Are the Common Challenges When Making Racing Go-Karts Street Legal?

Racing go-karts typically lack windshields, speed control devices, and essential lighting, making street legalization complicated. Adding these features may alter performance, while state laws impose strict emission and road use standards. Additionally, cost and time required for retrofitting and certification can be barriers.

Insurance safeguards owners against financial risk from accidents or damages while driving a street-legal go-kart. Without insurance, operating on public roads is illegal and risky. Liability coverage is often mandatory, with premiums varying based on the kart’s classification and use.

Redway Battery Expert Views

“At Redway Battery, we recognize that making a go-kart street legal is as much about safety and compliance as it is about reliable performance. Our advanced lithium-ion solutions deliver the consistent power required for lights, signals, and propulsion, crucial when retrofitting go-karts for public road use. Supporting enthusiasts worldwide, we prioritize innovation that bridges fun and functionality on the roads.” – Senior Engineer, Redway Battery

Conclusion

Making go-karts street legal is a multifaceted process requiring intricate knowledge of state laws, safety modifications, and vehicle classification. While most standard karts are track-only, upgrading essential features and employing advanced components like Redway Battery’s lithium solutions can unlock the potential for legal road use. Always verify local regulations and insurance requirements before hitting the streets.

FAQs

Q1: Can all go-karts be made street legal?
A1: Not all can; racing karts often require extensive modification, but many off-road karts can be adapted with safety equipment and proper registration.

Q2: Do go-karts need license plates to be street legal?
A2: Yes, registration usually entails receiving a license plate to operate legally on public roads.

Q3: How fast can a street-legal go-kart go?
A3: Most states limit street-legal go-karts to speeds under 25-35 mph depending on classification.

Q4: Are lithium batteries necessary for street legal electric go-karts?
A4: They are not mandatory by law but highly recommended for reliable power and compliance with safety device requirements.

Q5: Can I drive a street-legal go-kart on highways?
A5: No, they are usually restricted to roads with speed limits under a specified threshold, often excluded from highways.

How to make a go-kart road legal?

To make a go-kart road legal, you must add headlights, indicators, brake lights, mirrors, seat belts, windshield, and bumpers. The kart also needs to pass a safety inspection, be registered, insured, and have a license plate. It must comply with local road regulations for things like braking, emissions, size, and lighting. Check with your motor vehicle authority for exact requirements, as the process is complex and varies by location.

What are the rules for go-karts?

Go-karts are regulated for safety by motorsport clubs when used on tracks. These rules require helmets, protective clothing, and age or license restrictions. On public roads, go-karts are illegal unless fully modified and registered as a motor vehicle. Operation is generally limited to private land or official circuits unless all legal requirements for road use are met.

Can you get a street legal go-kart?

A street legal go-kart is possible but rare, requiring extensive modifications. The kart must have all safety features (lights, seat belts, mirrors, horn, etc.), be registered, insured, and pass inspections. Building or finding such a kart is expensive and time-consuming, and not all models can be made road legal.

Why aren’t go-karts road legal?

Standard go-karts aren’t road legal because they lack vital safety and road equipment—headlights, indicators, mirrors, bumpers, seat belts, emissions controls, and proper brakes. They don’t meet vehicle safety regulations and are designed for off-road or track use only, making them unsafe for public streets without modification.

How To Make A Go-Kart Road Legal In The UK?

In the UK, making a go-kart road legal means adding headlights, indicators, mirrors, seat belts, a windscreen, wipers, bumpers, and a horn. You must register the vehicle with the DVLA, get insurance, and pass an MOT inspection. The kart must also meet construction and emissions standards before it can be driven on public roads.

What Is A Street Legal Go Kart?

A street legal go-kart is a kart fully equipped with road-required features: working headlights, taillights, indicators, mirrors, windshield, seat belts, horn, and proper tires. It must be registered, insured, and pass safety inspections to qualify for use on public roads.

How To Get A Street Legal Go Kart In The UK?

To get a street legal go-kart in the UK, you’ll need to:

  • Add all mandatory safety features,

  • Register the modified kart with the DVLA,

  • Pass MOT inspection,

  • Obtain insurance and a logbook,

  • Ensure construction complies with UK vehicle standards.
    Contact local authorities early for approval guidance.

Can You Drive A Go Kart On The Pavement?

You cannot drive a go-kart on the pavement in the UK. By law, karts are not permitted on pavements, walkways, or public roads unless fully road legal. Use is limited to private property or race tracks only, with owner permission.

How To Make A Go Kart Street Legal?

To make a go-kart street legal, equip it with headlights, brake lights, turn indicators, mirrors, seat belts, windshield, horn, and bumpers. Register it with the motor vehicle department, get insurance, and pass required safety and emissions tests. Local laws vary, so check requirements before starting modifications.

Are Electric Go-Karts Street Legal In The UK?

Electric go-karts are not street legal in the UK unless modified with road equipment, registered, insured, and passing all inspections. Even electric models must meet the same road safety, emissions, and construction standards as their gas-powered counterparts.

Are Pedal Go Karts Street Legal?

Pedal go-karts are not street legal for road or pavement use. They lack required safety and registration features, so use is restricted to private land, parks (if allowed), or specially designated areas.

Where To Find Street Legal Go Karts For Sale?

Street legal go-karts are uncommon and usually custom-built. You may find them through specialist kit car builders, conversion companies, or classified ads for completed projects. Always verify registration, insurance, and compliance before purchase, and consult local authorities for legality in your area.

How to Make a Go-Kart Street Legal: Everything You Need to Know

How to Make a Go-Kart Street Legal: Everything You Need to Know

Making a go-kart street legal involves meeting specific safety standards and regulations set by local authorities. This typically includes modifications such as adding lights, turn signals, and mirrors, as well as passing an inspection. Understanding these requirements is crucial for anyone looking to drive their go-kart on public roads.

Introduction to Street Legal Go-Karts

Street legal go-karts have become increasingly popular among motorsport enthusiasts who want to enjoy their vehicles beyond the confines of race tracks. However, transforming a go-kart into a street-legal vehicle requires adherence to various regulations and safety standards that can vary by location.

Understanding Go-Kart Legality

The legality of operating a go-kart on public roads depends on several factors, including local laws and regulations governing motor vehicles. In many jurisdictions, go-karts are classified as low-speed vehicles (LSVs) or off-road vehicles, which may have different requirements for street use.

Key Considerations:

  • Local Regulations: Always check with your local Department of Motor Vehicles (DMV) or equivalent authority for specific laws regarding go-karts.
  • Vehicle Classification: Understand how your go-kart is classified in your state or country.

Requirements for Making a Go-Kart Street Legal

To make a go-kart street legal, it must meet certain criteria set by local authorities:

Requirement Description
Safety Features Must include headlights, taillights, turn signals, and mirrors
Speed Limit Typically must not exceed 25 mph on public roads
Registration Must be registered as a motor vehicle
Insurance Liability insurance may be required

Ensuring compliance with these requirements is essential before attempting to drive your go-kart on public roads.

Common Modifications Needed for Street Legality

Modifying your go-kart is often necessary to meet legal requirements:

  1. Lighting: Install proper headlights, taillights, and turn signals.
  2. Mirrors: Add side mirrors and a rearview mirror.
  3. Seatbelts: Equip the go-kart with seatbelts for driver and passengers.
  4. Windshield: Some jurisdictions require a windshield for street use.
  5. Speed Limiting Devices: In some areas, you may need to install devices that limit the top speed.

These modifications help ensure the safety of the driver and others on the road.

Safety Features Required for Street Use

Safety features are critical when converting a go-kart for road use:

Feature Purpose
Headlights Improve visibility during night driving
Taillights Alert other drivers of your presence
Turn Signals Indicate turning intentions
Seatbelts Protect occupants in case of an accident

Implementing these features not only helps in compliance with regulations but also enhances overall safety.

Registration and Inspection Process

Once modifications are complete, the next steps involve registration and inspection:

  1. Inspection: Schedule an inspection with your local DMV or authorized inspector to ensure compliance with safety standards.
  2. Documentation: Prepare necessary documents such as proof of modifications, identification, and any required fees.
  3. Registration: After passing inspection, register your go-kart as a motor vehicle, obtaining a license plate if required.

Completing these steps is essential for legally operating your go-kart on public roads.

Popular Models of Street-Legal Go-Karts

Several models are known for their suitability as street-legal vehicles:

  • Polaris Slingshot: A three-wheeled motorcycle-style vehicle that offers impressive performance.
  • Campagna T-Rex: A unique design that combines motorcycle dynamics with car-like features.
  • Vanderhall Venice: A stylish three-wheeled vehicle designed for comfort and performance.

These models often come equipped with the necessary features to meet street legality requirements right out of the box.

User Experiences and Insights

Many users share their experiences regarding making their go-karts street legal:

  • Some enthusiasts report that while the process can be time-consuming, it is rewarding to drive their modified go-karts on public roads.
  • Others emphasize the importance of thorough research into local regulations before starting modifications.

Real-world feedback highlights both the challenges and joys of owning a street-legal go-kart.

Latest News on Go-Kart Regulations

Enhanced Safety Modifications: In 2025, there is a growing emphasis on enhancing safety features for go-karts to meet street-legal standards. This includes installing high-quality hydraulic brakes, turn signals, and rearview mirrors to ensure visibility and safety on public roads.

State-Specific Regulations Update: States in the U.S. continue to refine their regulations regarding street-legal go-karts. For instance, some states now require the installation of speed governors to limit go-karts to a maximum speed of 25 mph, ensuring compliance with low-speed vehicle laws.

Increased Focus on Registration and Insurance: There is a heightened focus on the registration and insurance requirements for street-legal go-karts. Owners must obtain specialized insurance policies and register their go-karts with the DMV, similar to other vehicles, to ensure legal operation on public roads.

Redway Expert Comment

Transforming a go-kart into a street-legal vehicle requires careful planning and adherence to local regulations,” says an expert from Redway Battery Solutions. “Investing in proper modifications not only enhances safety but also ensures you can enjoy your go-kart legally on public roads.”

Frequently Asked Questions (FAQs)

Are all go-karts street legal?

No, not all go-karts are street legal; they must meet specific safety standards and regulations set by local authorities.

What modifications are needed to make a go-kart street legal?

Common modifications include installing lights, turn signals, mirrors, seatbelts, and possibly a windshield.

How do I register my go-kart?

After making necessary modifications and passing inspections, you can register your go-kart at your local DMV or equivalent authority.

Can I drive my go-kart on public roads without registration?

No, driving an unregistered go-kart on public roads is illegal; it must be registered as a motor vehicle first.

Know more:

are golf carts street legal in maryland
are go karts street legal
street legal go kart

How can I make my go-kart street legal?
To make your go-kart street legal, you need to equip it with necessary safety features such as headlights, taillights, turn signals, and a horn. Additionally, ensure it has a rearview mirror, seat belts, and a windshield. Check local laws for specific requirements and obtain any necessary permits or registrations.

What safety equipment is required for a street-legal go-kart?
A street-legal go-kart typically requires safety equipment including functioning headlights, taillights, brake lights, turn signals, and a horn. It should also have seat belts, a rearview mirror, and possibly a windshield. Ensure all components meet local regulations for road use to ensure compliance.

Do I need insurance for my street-legal go-kart?
Yes, you will likely need insurance for your street-legal go-kart. Check with your local insurance providers to find coverage options that meet state requirements. Insurance can protect you from liability in case of accidents or damage while operating your go-kart on public roads.

How do I register my go-kart for street use?
To register your go-kart for street use, visit your local Department of Motor Vehicles (DMV) or equivalent authority. Provide necessary documentation such as proof of ownership, compliance with safety standards, and any modifications made. Pay applicable fees to obtain your registration and license plates.

What modifications are necessary to make a go-kart street legal?
Necessary modifications to make a go-kart street legal include installing lights (headlights and taillights), turn signals, a horn, seat belts, and a rearview mirror. You may also need to add fenders and a windshield depending on local regulations. Ensure all modifications comply with state laws.

Are there specific laws regarding go-karts on public roads?
Yes, laws regarding go-karts on public roads vary by state and locality. Some areas allow them on certain roads while others prohibit them entirely. Always check local traffic laws to understand where you can legally operate your go-kart and what safety requirements must be met.

How to make your go kart road legal?
To make a go-kart road legal, you must fit safety equipment like headlamps, indicators, mirrors, seatbelts, and windscreen. The kart needs an appropriate chassis, proper brakes, exhaust controls, number plates, registration, insurance, and an MOT pass. Consult your local transport authority for specific compliance checks, as requirements are strict and modifications substantial in most regions.

Can you get a street legal go kart?
Yes, you can get a street legal go-kart, but it usually requires significant modifications to meet local motor vehicle safety regulations. Road-legal go-karts need approved lighting, indicators, seatbelts, bumpers, mirrors, proper registration, insurance, and sometimes compliance testing before they may be driven on public roads.

How fast is a 1000W Go Kart?
A 1000W go-kart generally reaches speeds of 15 to 25 mph (24-40 km/h), depending on the kart’s weight, gearing, and terrain. Electric models with this power level are commonly meant for recreational use on tracks or private areas, not public roads.

How to get a VIN number for a Go Kart?
To get a VIN number for your go-kart, you must apply through your country’s vehicle licensing authority. This typically involves inspection, proof of ownership, and confirmation the kart meets safety and legal standards. The authority assigns a VIN if your build passes their checks and requirements.

How To Make A Go-Kart Road Legal In The UK?
Making a go-kart road legal in the UK involves adding features like headlights, indicators, a windscreen, mirrors, seatbelts, and bumpers. You must ensure the kart meets minimum vehicle dimensions, pass an MOT test, and secure registration, insurance, and tax. Consulting local authorities is essential for up-to-date requirements and legal certifications.

Can You Drive A Go-Kart On The Road In The UK?
Driving a go-kart on UK public roads is generally not permitted unless it has been converted to meet all road-vehicle standards, registered, insured, and passed an MOT. Most go-karts fail to satisfy these requirements due to design and safety limitations, so road use is rare for standard models.

Where To Find Road Legal Go-Karts For Sale In UK?
You can find road-legal go-karts for sale in the UK at specialty kit car dealerships, classified ads, or custom vehicle builders. Always verify the kart has valid registration, insurance, and compliance documentation before purchase, as street-legal karts are uncommon and should be inspected thoroughly.

What Are Street Legal Go-Karts?
Street legal go-karts are vehicles built or modified to comply with all local vehicle requirements for use on public roads. These usually include working lights, seatbelts, number plates, horns, mirrors, safety glass, bumpers, insurance, and registration. They must pass safety inspections before legal road use.

Are Electric Go-Karts Street Legal In The UK?
Most electric go-karts are not street legal in the UK without major upgrades to meet full motor vehicle standards. This includes passing an MOT, adding safety features, and securing registration and insurance. Standard electric go-karts are only legal for use on private land and designated tracks.

Where To Buy Street Legal Go-Karts For Sale?
Street legal go-karts are available from specialized kit car retailers, custom builders, or online marketplaces focusing on unique or modified vehicles. Always check that they are registered, insured, and comply with local road laws before purchasing for use on public roads.

What Is A Street Legal Go-Kart For Adults?
A street legal go-kart for adults is a modified or purpose-built kart that meets all road safety, registration, and emissions standards. It will feature seatbelts, legal lighting, mirrors, safety glass, registration plates, and insurance, typically designed for recreational driving or short commutes.

Are Go-Karts Legal On UK Sidewalks?
No, go-karts are not legal on UK sidewalks or pavements. Driving any unregistered vehicle, including go-karts, on footpaths or public areas is prohibited by law. Go-karts can only be used on private property with the owner’s permission or on approved racing tracks.

What Does Battery Group Size Mean and Why Is It Important?

What Does Battery Group Size Mean and Why Is It Important?

Battery group size refers to the standardized dimensions and specifications assigned to batteries, particularly in automotive applications. This classification helps consumers select the correct battery for their vehicles, ensuring proper fit and compatibility. Understanding battery group sizes is essential for optimizing performance and safety.

Understanding Battery Group Designations

Battery group designations refer to standardized size, terminal placement, and capacity ratings set by the BCI (Battery Council International). These classifications help ensure compatibility with different vehicles and applications, making it easier to select the correct replacement battery.

Designation Length (inches) Width (inches) Height (inches)
Group 24 10.25 6.75 9.0
Group 27 12.0 6.75 9.0
Group 31 13.0 6.8 9.5

These designations ensure that batteries fit securely within designated compartments in vehicles, preventing movement that could lead to damage.

Common Battery Group Sizes and Their Applications

Popular battery group sizes include Group 24, 27, 31 (marine and RV), Group 35, 48, 49 (automotive), and Group U1 (lawn equipment). Larger batteries provide higher capacity, while smaller ones fit compact vehicles or specialized applications.

Different vehicles require different battery sizes based on their design and power needs. Here are some common group sizes and their typical applications:

Group Size Application
Group 24 Standard cars, light trucks
Group 27 SUVs, larger trucks
Group 31 Heavy-duty trucks, commercial vehicles

Choosing the correct group size is crucial for ensuring that the battery can provide adequate power for starting and running vehicle systems.

Factors Influencing Battery Group Size Selection

Selecting the right battery group size depends on vehicle compatibility, power requirements, physical dimensions, and terminal configuration. Climate also plays a role, as colder temperatures require higher cold cranking amps (CCA) for reliable starts.

Several factors influence which battery group size is appropriate for a given vehicle:

  1. Vehicle Make and Model: Different manufacturers have specific requirements for battery sizes.
  2. Engine Type: High-performance engines may require larger batteries with higher cold cranking amps (CCA).
  3. Accessories: Vehicles with additional electrical accessories may need batteries with greater capacity.

Importance of Choosing the Right Battery Group Size

Using the correct battery group size ensures proper fitment, optimal performance, and reliable power delivery. A mismatched battery may lead to poor electrical performance, reduced lifespan, or even damage to the vehicle’s electrical system.

Selecting the correct battery group size is vital for several reasons:

  • Fitment: A battery that is too large may not fit properly, while one that is too small may not provide adequate power.
  • Performance: The right size ensures optimal performance, especially in extreme weather conditions.
  • Safety: Properly fitting batteries reduce the risk of movement during operation, which can lead to short circuits or damage.

How to Determine Your Vehicle’s Battery Group Size

To find your vehicle’s battery group size, check the owner’s manual, existing battery label, or manufacturer specifications. Auto parts stores and battery retailers also provide fitment guides to ensure the correct replacement.

To find your vehicle’s required battery group size:

  1. Check the Owner’s Manual: Most manuals will specify the correct group size.
  2. Look at the Existing Battery: The group size is usually printed on the label.
  3. Consult a Fitment Guide: Many auto parts stores provide online tools or booklets that list compatible battery sizes based on vehicle specifications.

Latest News in Battery Technology

Recent developments in battery technology focus on improving efficiency, longevity, and environmental sustainability. Innovations such as solid-state batteries promise enhanced safety and performance over traditional lead-acid and lithium-ion options. Additionally, advancements in recycling processes aim to reduce waste associated with battery disposal.

Expert Insights

“Understanding battery group sizes is essential for anyone looking to replace or upgrade their vehicle’s battery,” says an automotive expert. “Choosing the right size not only ensures compatibility but also enhances overall vehicle performance.”

FAQ Section

Q1: What is a battery group size?
A1: A battery group size refers to a standardized designation that indicates the physical dimensions and specifications of a battery suitable for specific applications, particularly in vehicles.Q2: How do I find my vehicle’s battery group size?
A2: Check your vehicle’s owner’s manual, look at the existing battery label, or consult an auto parts store’s fitment guide.Q3: Why is choosing the correct battery group size important?
A3: The correct size ensures proper fitment, optimal performance, and safety during operation.

Know more:

battery group size meaning
auto battery sizing charts

How to Choose the Right Auto Battery Size: A Comprehensive Guide

How to Choose the Right Auto Battery Size: A Comprehensive Guide

Choosing the correct auto battery size is crucial for ensuring your vehicle operates efficiently and reliably. The size of a battery affects its fitment, power output, and overall performance. Understanding battery group sizes, specifications like Cold Cranking Amps (CCA), and how to determine the right size for your vehicle is essential for every car owner.

Understanding Battery Group Sizes

What is BCI Group Size?

The Battery Council International (BCI) assigns group sizes to batteries based on their dimensions, terminal arrangement, and performance characteristics. This classification helps consumers select batteries that fit their vehicles properly.

BCI Group Size Dimensions (LxWxH in inches) Common Applications
24 10.25 x 6.8125 x 8.875 Passenger cars
27 12.0625 x 6.8125 x 8.875 SUVs and light trucks
31 13 x 6.8125 x 9.4375 Heavy-duty vehicles
34 10.25 x 6.8125 x 7.875 Compact cars

Common BCI Battery Group Sizes

Here are some common BCI battery group sizes along with their typical applications:

Group Size Dimensions (inches) Typical Use
24 10.25 x 6.8125 x 8.875 Standard passenger cars
27 12.0625 x 6.8125 x 8.875 SUVs
31 13 x 6.8125 x 9.4375 Trucks and vans
34 10.25 x 6.8125 x 7.875 Compact vehicles

Key Specifications for Auto Batteries

Cold Cranking Amps (CCA)

Cold Cranking Amps (CCA) measures a battery’s ability to start an engine in cold temperatures. A higher CCA rating indicates better performance in colder climates.

CCA Rating Temperature Range Performance Level
Below 400 Below freezing Poor starting capability
400 – 600 Moderate cold Adequate for most vehicles
Above 600 Extremely cold Excellent performance

Reserve Capacity (RC)

Reserve Capacity (RC) indicates how long a battery can run on its own power without the engine running, which is crucial for powering electrical systems when the alternator is not charging.

RC Rating Duration Usage
Below 90 Less than an hour Minimal electrical use
90 – 120 Up to two hours Standard usage
Above 120 More than two hours High accessory usage

Dimensions and Fitment

The physical dimensions of the battery must match the specifications of your vehicle’s battery tray to ensure proper fitment and secure installation.

How to Determine the Right Battery Size for Your Vehicle

Checking Your Owner’s Manual

The owner’s manual typically provides detailed information about the recommended battery size, including group size, CCA, and RC ratings.

Inspecting Your Current Battery

If you cannot find your manual, inspect your current battery for labels that indicate its group size and specifications.

Using Online Resources

Many websites offer tools where you can enter your vehicle’s make, model, and year to find compatible battery options.

Importance of Choosing the Right Size

Using a battery that does not fit your vehicle’s specifications can lead to poor performance, electrical issues, or even damage to your vehicle’s electrical system. Ensuring you select a compatible battery helps maintain optimal functionality and longevity.

Latest News in Automotive Battery Technology

Recent advancements in automotive batteries focus on improving energy density, reducing weight, and enhancing performance in extreme temperatures. Innovations such as lithium-ion batteries are becoming more prevalent in electric vehicles, offering longer lifespans and faster charging times compared to traditional lead-acid batteries.

Redway Expert Comment

“Selecting the right auto battery size is critical not just for fitment but also for ensuring reliable vehicle performance under various conditions. Always refer to manufacturer specifications or consult with professionals if you’re unsure about your choice.” – Automotive Specialist

Frequently Asked Questions (FAQs)

How do I know what size battery my car needs?

Check your owner’s manual or look at the label on your current battery for its group size.

Can I use a different size battery than recommended?

It’s advisable to use the recommended size; using a different one can lead to compatibility issues.

What does CCA mean?

Cold Cranking Amps (CCA) measures how well a battery can start an engine in cold temperatures.

How often should I replace my car battery?

Typically every three to five years, but it depends on usage and environmental conditions.

Know more:

battery group size meaning
auto battery sizing charts

Search products

Need a Quick Quote on Wholesale Prices? Contact Redway Battery Now.

X
Product has been added to your cart


Shenzhen Redway Power, Inc

Tel: +86 189 7608 1534
Tel: +86 (755) 2801 0506
E-mail: contact@redwaybattery.com
Website: www.redway-tech.com
Youtube: @RedwayPower
TikTok: @redwaybattery

Get a Quick Quote

Hot OEM

Forklift Lithium Battery
Golf Cart Lithium Battery
RV Lithium Battery
Rack-mounted Lithium Battery

Hot Batteries

24V 150Ah Forklift Lithium Battery
24V 200Ah Forklift Lithium Battery
48V 400Ah Forklift Lithium Battery
48V 600Ah Forklift Lithium Battery
80V 400Ah Forklift Lithium Battery
36V 100Ah Golf Cart Lithium Battery
48V 100Ah Golf Cart Lithium Battery
51.2V 50Ah 3U Rack-mounted Lithium Battery
51.2V 100Ah 3U Rack-mounted Lithium Battery
12V 100Ah RV LiFePO4 Lithium Battery (Self-heating)

Hot Blog

Golf Carts
Server Rack Battery
Knowledge